
DOWNLOAD THE APP


Customer Services
Copyright © 2025 Desertcart Holdings Limited
DOWNLOAD THE APP


🧱 Transform your walls, transform your vibe!
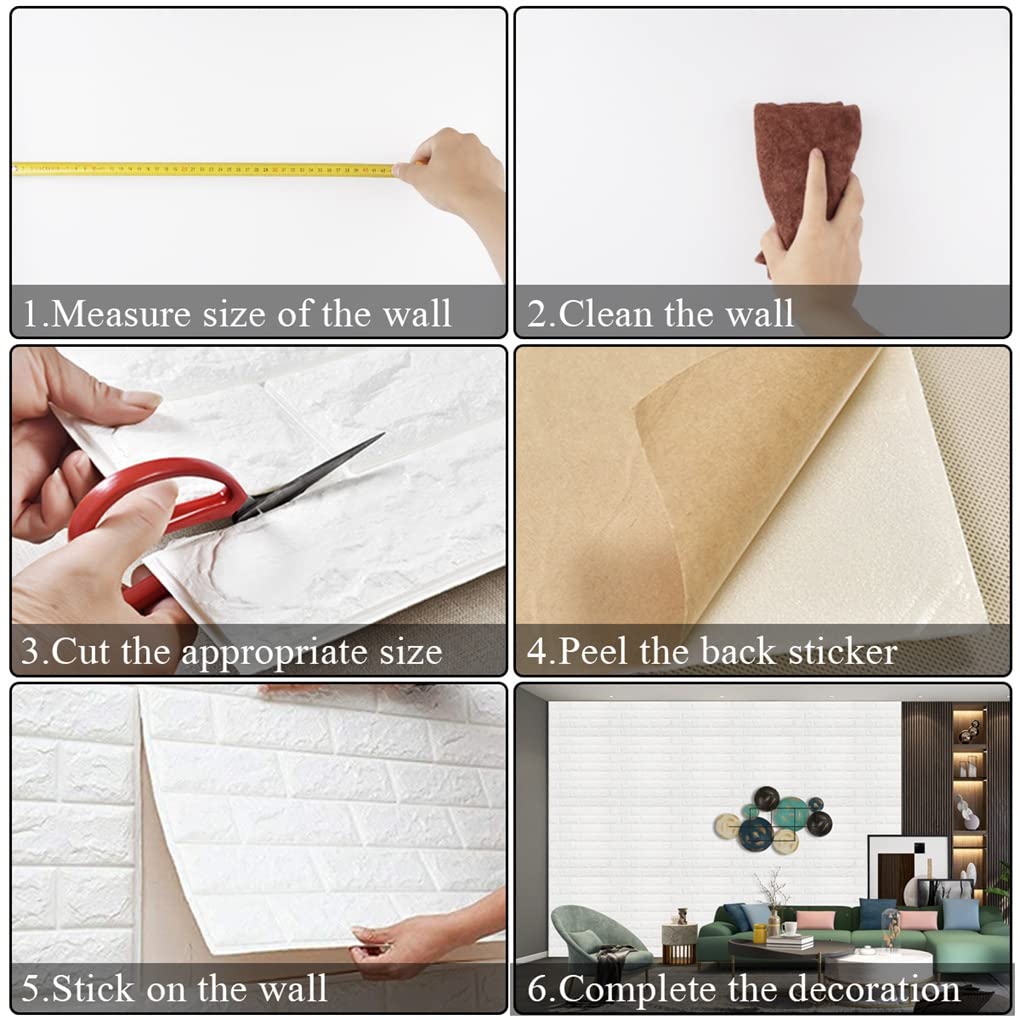
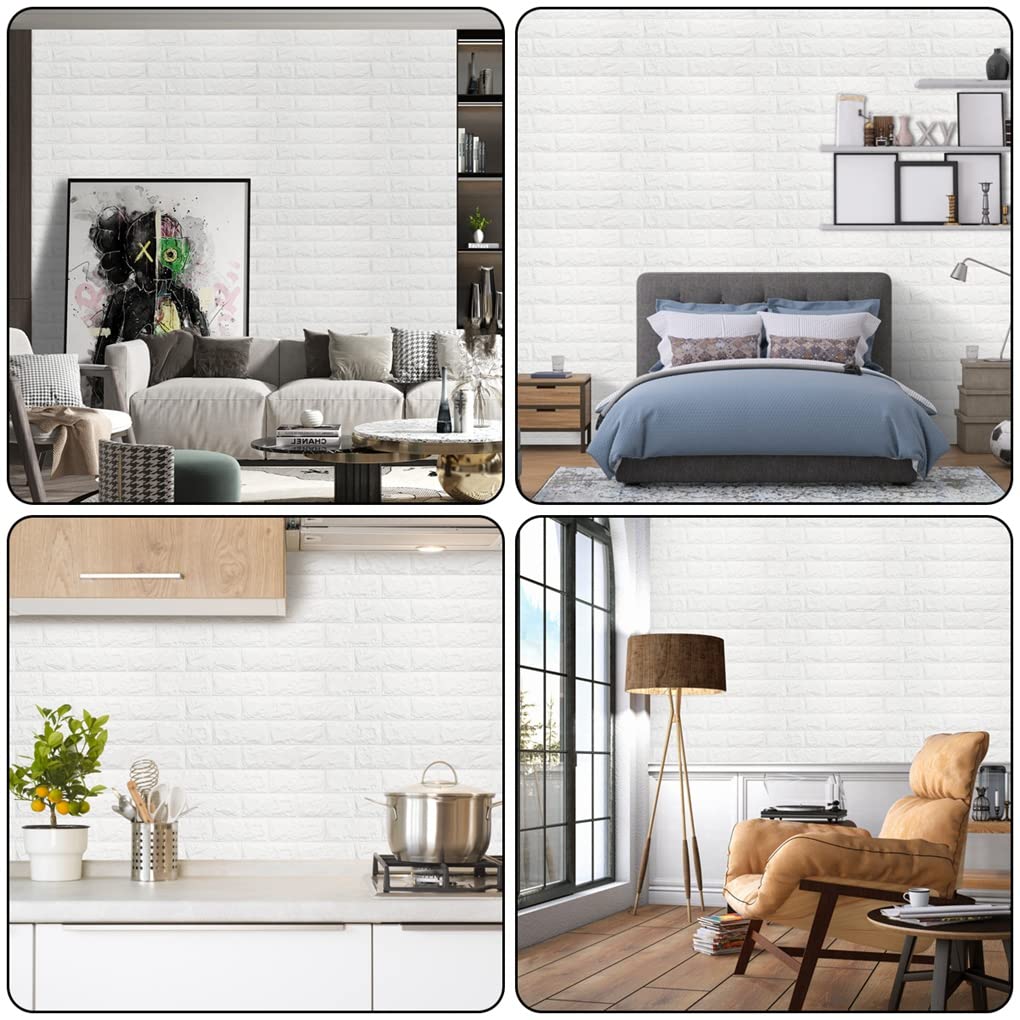
Arthome Brick Wall Panels offer a premium, self-adhesive 3D foam brick design covering 38.7 sq.ft with 10 large panels. Made from safe, waterproof PE foam, these easy-to-install panels protect walls and add stylish texture to any room, from living areas to kitchens, with minimal effort and maximum impact.


| Material | Plastic |
| Color | Pearl White |
| Brand | Arthome WALL DECOR |
| Style | Modern |
| Item Weight | 2.29 Pounds |
| Product Dimensions | 23.62"L x 23.62"W |
| Coverage | 58 square feet |
| Pattern match | Straight Match |
| Theme | Vintage |
| Is Stain Resistant | Yes |
| Unit Count | 10.0 Count |
| Manufacturer | Arthome WALL DECOR |
| Number of Items | 10 |
| Installation Type | Self-Adhesive |
| Part Number | 10 |
| Item Weight | 2.29 pounds |
| Size | 10 Pack 38.7 Sq.ft |
| Shape | Square |
| Number Of Pieces | 10 |
| Batteries Included? | No |
| Batteries Required? | No |
J**.
These panels are AWESOME!
I absolutely LOVED working with these panels. They are very easy to cut and very flexible. I actually had FUN placing them on the wall. They stuck VERY well. I took one small cut off piece off to replace it with another, and it was very, very well stuck on. They look fantastic! I was amazed at how realistic they look. The panels are foam and quite "bouncy" - you can push your finger into it and it comes back out. I also like the color. It's like a pearl white. I was going to paint it white since I wasn't sure how it was going to turn out with caulking, but it turns out I didn't even need to paint it. I LOVE IT how it is, as-is. I am so pleased I felt I had to take pics and write a review.Here are some TIPS:1) When figuring out the square footage, remember that if you choose to cut out and interlock the panels (which is the way to do it - looks SO much more realistic) you will be taking some of the square footage away. I was considering only getting 20 panels, which was about 11 sq. feet more than my calculation, but decided to get the additional pack of 10 and I am glad I did. When taking out the "notches" to interlock them, it will decrease the amount of footage you have. I ended up using one of the panels in the smaller pack of 10. I have 9 left and I am thinking about using them in another place. Also, with the "notches" cut out, I have a bunch of single pieces I can use somewhere else in some other way.2) I placed one piece in the upper left corner and used a level to make sure it was level - can't ever rely on the ceiling being level, plus I have popcorn ceilings in the room (don't judge, I like them), so using the level is the way to go, otherwise you may find yourself going downhill by the time you get to the other side of the wall. Then I marked the bottom of the panel. I took a long ruler and continued the line down the wall, checking each time to make sure it is level using the level on the long ruler. Then I started with the first panel, second, etc., left to right, and making sure each panel was level along the line. NOTE: I DID have to make some cuts at the top, sometimes bottom, and often along the top or bottom of the cut outs to make it fit and level. But they are very easy to cut and very easy to manipulate. Make sure you place the panel first on the wall with the adhesive cover still on it so you can move it, adjust, trim, etc. BEFORE adhering it.3) When the panel was ready to place, I used a method I've used in the past when I would use adhesive material on poster board. Fit it exactly how it should adhere on the wall, then HOLD the piece to the wall (helps with someone to do that) and then take ONE of the "bricks" that are part of the interlocking and pull off the adhesive protective paper JUST on that one part of the panel. Then adhere just that one part. Continue with the next one down and so on. Sometimes I would adhere the one below the top one just because then I could manipulate the top piece because of fit. Once two of them are adhered, the panel is easier to work with, then continue with the other few cutout bricks (there is a picture). Then, pull the panel away from the wall (like a door) and the adhered pieces with allow you to then pull the other adhesive protective paper away. Then "roll" it back on the wall and push it to hold. The adhesive is very good, so remember that once it's on, it's on.4) Trimming is easy. And because the foam is flexible, you can easily fold it over, cut, trim, etc. around obstacles, or outlets, etc.5) Don't be too concerned about gaps within the panels as long as they aren't really big. Try to fit and trim closely, but even a quarter inch gap will fill in nicely with caulk.6) Caulk! I was amazed at how nicely it all came together with the magic of caulk. I caulked the gaps where the panels connect and it turned out so well. Even if you end up painting another color, I would suggest caulking anyways. Caulking also relieves some pressure on having to trim and place exactly.7) These panels are flexible! When I was placing the panel and cut out parts, I could stretch an area a bit or adjust it to fit in a specific area or "fix" some part because it looked a bit off. AMAZING!8) Have fun with it! You will find yourself wanting to use these panels in other areas or in other projects. I may do another wall already!
C**2
Looks great on the wall! Lots of compliments!
I read all the other reviews and I agree. Make sure you take the time to cut out the half brick on each section. This will help you stagger the bricks and make them look more natural.I used a flat piece of wood underneath and a sharp box cutter type blade for cutting. It was actually pretty easy!The sticky side is SUPER sticky so make sure you get it right the 1st time otherwise you’ll be in for a big mess.When sticking on the wall I just peeled back a few rows at a time so I was able to line everything up slowly. It’s seriously sticky!!To finish it off I used white tile caulk and ran a bead along the seams. I love it so far!!It’s so easy and a quick install. Just take your time with the prep work .
M**T
Great Effect but requires detail and effort.
This product looks terrible when you take delivery: shiny white, folded Styrofoam squares that weigh nothing. But with effort, patience and creativity you can transform a space. This product is soft and under close examination any realism fades so I recommend using it for accent walls where the tromp loile effect is best.To check for a realistic look I measured the bricks ( which have great if uniform detail). A standard brick is 2" X 8" and these measure 2" X 7.5" so pretty close but the mortar line is a bit thin.I easily cut out the half bricks to achieve a seamless interlocking look using sharp scissors and then, using a level as I went, hung the panels starting from a corner top to bottom. I think covering more than an accent wall would be too much but if you do you will need to snap a level line all around. The adhesive is ok and I was able to pull off and reposition without problems. I sparingly used liquid nail adhesive for areas that needed it.Don't worry too much about gaps, making level lines panel to panel is more important. After the panels were hung I went over the whole wall and used a utility knife with a fresh blade to cut out overlaps and 30 minute paintable calking to fill any gaps.Finally I put a uneven coat of grey paint on and then a coat of uneven white over the grey to achieve a weathered look. I am pretty happy with the finished product for about $150 and 2 days!
M**E
Great product
These were purchased for a project in my office where I closed up an extra entrance with sheetrock and the perpendicular wall had a full 8' X 12' sectional mirror stuck to the wall. Knowing I am not great at sheetrock...this will fit the bill.Highly recommend the exacto knife for cutting, especially around outlets and switchcovers. Since it adds depth to the wall, you will probably have to loosen any switches or outlets by a few turns of the screw so your cover screws will "reach". It will NOT adhere very well to dried sheetrock mud without some kind of primer. However, I just used some general purpose spray adhesive...worked find.I used a 1/2" nap roller and, "accidentally" it didn't paint over the "fake mortar" of course...after looking at it when done...it creates a nice "effect"...so I left it alone. Room is a work in progress, hence not finishing the last narrow row above the baseboard as the room is getting new flooring and baseboards.Great product, will be ordering more.
L**.
HOLY COW this faux brick is amazing
I am extremely pleased! ***NOTE*** if you get more than one box, make sure to see if they are of the same size. We got two different lots that didn't quite match up and had to wait for another box to get sent so we could finish the project. This looks like real brick, but it is softer foam. It makes having it next to a bed or desk nice, because there is no rough surface. It also increases the soundproof-ness of any wall you put it on. I REALLY like it and am looking for other areas I can put more!
Trustpilot
1 day ago
1 week ago