Desert Online General Trading LLC
Dubai, United Arab Emirates
Desert Online General Trading LLC
Dubai, United Arab Emirates


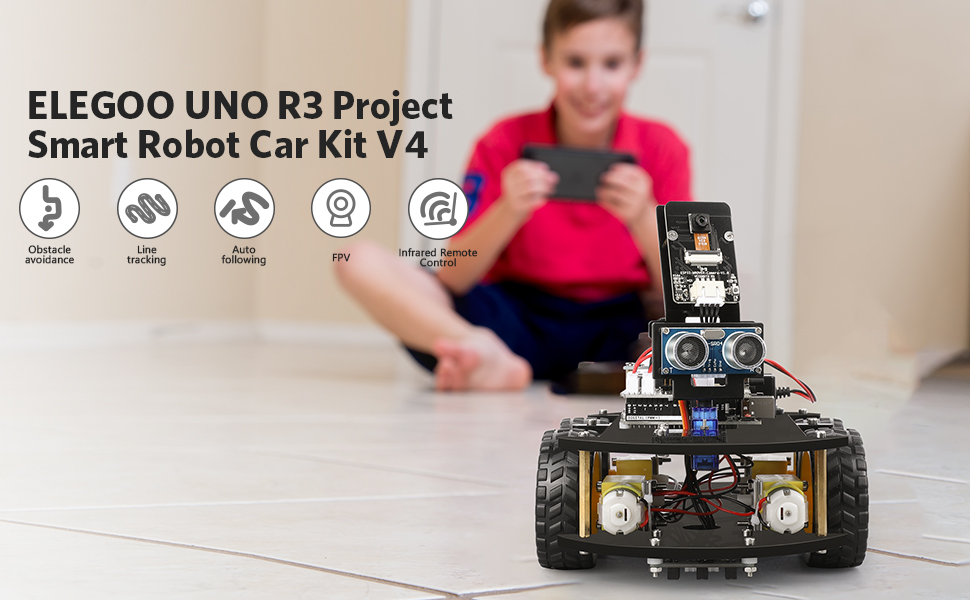
🤖 Build, Code, Conquer! Unleash the engineer within!
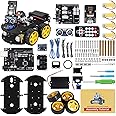
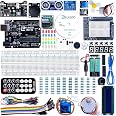
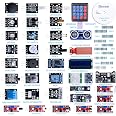
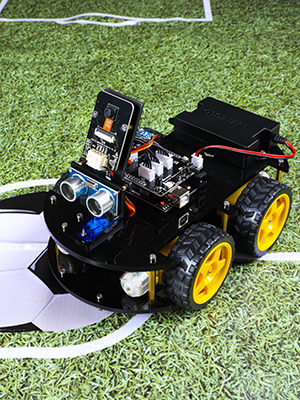
The ELEGOO R3 Smart Robot Car Kit V4 is a comprehensive educational STEM kit designed for kids aged 8-16. It includes 24 different module parts for various functionalities like obstacle avoidance and line tracing, and can be controlled via mobile devices. With easy assembly and detailed tutorials, this kit is perfect for introducing young minds to programming and robotics.


| Theme | Vehicle |
| Item Dimensions | 8 x 7 x 6 inches |
| Item Weight | 1.23 Kilograms |
I**X
Easy to assemble & excellent documentation! Great science fair type of project.
I've assembled several robot kits like these but this has got to be the best so far hands-down. Everything about this project is well done from the packaging (components are well labeled in separate boxes & baggies) to the documentation (printed and download). I was able to follow the included printed assembly manual and put the robot together in about an hour. Elegoo has even included three small tools so you won't need to use any of your own unless that's your preference.The included Uno clone is preprogrammed with all of the necessary functionality so all you've got to do is power it on and choose the desired function via the IR remote. You can also download an iOS or Android companion app to control the robot via bluetooth although that's not something I've tried yet so I can't comment on how well it works. Of course, the Arduino software is available from Elegoo's website if you want to experiment with uploading your own sketches.I downloaded the surprisingly large zip file for this product (1 GB) and briefly browsed the multilingual contents. They've done a good job with this documentation as well! The Arduino source code is included by various build/functionality stages and PDFs are included that explain everything in that particular stage.This little car really zips along, too! I haven't tested the line-following function but the obstacle avoidance function works pretty well. It can get stuck in this mode if the car approaches an object at a shallow enough angle which doesn't trigger the ultrasonic distance sensor but waving your hand (or foot) in front of it does the job. Manual drive mode works very well using the included IR remote.TL;DR: Quality of the electronics is fair, hardware is excellent & solid, documentation is really excellent for non-native English speakers. It is actually a bargain for all of the components you get and how well the fit & finish is. My only gripe is how easily fingerprints and dust show up on the piano black acrylic body pieces. That's a minor annoyance, IMHO. If you're on the fence about buying this, you shouldn't be. It's honestly a great robotics project that gives you more than you'd expect for the price. I'll update this review if I encounter any problems but, so far, it's worked well!
A**R
Great little robot
This is a great robot that works better than I had expected!It is fast and the FPV mode is a blast! There is a lot of potential with this little bot, the motors could support small payloads or additional modules without too much difficulty. The assembly was pretty easy aside from a few odd angles of illustrations in the manual that led to removing a few screws and making adjustments. There is a great slideshow of assembly I didn't find until after I had assembled it, you can find it in the sellers item description links. Also be sure to check out the links that have the app to control the robot, I made the mistake of listening to the manual and going to the Play store and downloaded another Elegoo app that controls the robot but isn't compatible with the camera.My only real complaint would be the angle of the camera mount, it is about 45 degrees above the horizontal plane of the robot (maybe less) and can make it a tiny bit difficult to see obstacles directly in front. This robot would be perfect if there was a vertical gimbal so you could have more control over the camera. I'm going to add that functionality later but that isn't a beginner friendly project.I'm impressed with the robot and would definitely recommend it to those looking for a project or a new toy. Since it is programmable there are limitless options to modify it to do a variety of tasks. So much potential for such a reasonable price point!
J**S
We got past the IDE compiler errors, but it’s really been a challenge to drive or expand it tho.
I really like it a lot. My 9yo grandson, and 12 yo grandson each built one. The manual combined with the YT video steps were very helpful but you definitely need both and it’s difficult in a couple spots where it’s easy to get confused by the nearly symmetrical config of the top and bottom base plates.. the screw length for the ESP32 CAM to it's mounting bracket appeared to be too short, so I used a couple linger screws n the kit, But just today found out I had installed the Ultrasonic Sensor Bracket that mounts onto the servo backwards.. flipping it would have solved the problem which appeared to be that the screws were too short.. And when we built the second one I only then realized we’d built the 1st incorrectly .. I ran fine but the motors are supposed to be sandwiched Between the top and bottom plates, not below the bottom plate.. and altho this mistake is possible / easy to make.. with that plate flipped over the line sensors don’t work well since they ride almost an inch higher off the taped line on the ground.Anyway both ran perfectly well initially but we found one stared disconnecting from the WiFi a lot every time you’d try to move it. This appears to be the WiFi is too weak in this parents house so we’re not only getting a repeater to extend it to that part of the house about 100 ft away, but there is also a s/w fix in the CAM32 module that can change the WiFi RF channel and fixit there in s/w too.. I've never had this problem at my house tho..so have not tried to fixit in s/w since it's not broke here.Another problem is the IR remote must be within 3 to 4 feet or so max and pointing directly at the receiver on the top board.. we find it works much much better in FPV mode using WiFi.It’s set up to run WAY to fast in all directions so does wheelies if you go forward and spins in circles if you try to gradually turn left or right. Elegoo service emailed a fix for these issues since pressing 9 to reduce speed only seems to work in IR Remote controller mode, and only till you cycle the POWER ON/OFF.The battery worried me too.. I was not sure if it can be left unattended on the charger, but have been assured there is a BMS that will prevent over charging if it's left plugged in over night.... and line following mode didn’t initially work at all, since we had the motors mounted below the bottom B plate not above ..but I haven't tried to adjust it's sensitivity yet.. the FPV cam is fantastic tho.. and it’s a ton of fun to try navigating it since it’s ridiculously sensitive with the factory s/w .. I also followed the steps to set up the Arduino IDE library but the main V4 .ino system file Would not initially compile without errors .. The vendor support has resolved that with an update that allows it to run on the latest IDE 1.8.19 as well as the latest AVR UNO Board manager 1.8.5. And I can now report it also compiles and runs with the latest RC2 Change 3 IDE version too..one thing I’d like to add is a camera that tilts up and down OR mini grabber arm, and there IS a servo2 slot that is on the board to support that., Its used with the Conquer version of the robot and it's controllable via WiFi with the same Elegoo App. It’s got a block language but very limited features and flexibility in that mode.. I did get a second one as soon as I confirmed that I can mod their systems code and add new options to it. I have an MBot Mega robot too and like this one’s documentation and potential programmability a lot better., but honestly the main code in both robots is way too complex for beginner Arduino programmers .. they’re Starter Kits are far better to use as programming learning tools.An old update.. I spent a couple days trying to figure out why I was getting IDE pre-compiler errors due to missing custom libraries. I finally resolved it but only by moving to a laptop and using the Add Zip option to install each library folder independently and the normal way. I finally got a one line reply from support saying that they’d read my email sent 4 days ago… pretty sorry response.. I want to know what mods in the s/w are required to slow its and speed down, and how to switch WiFi RF channels .. and have yet to determine why they want us to add library’s Manually with a copy/paste.. that’s left my main PC in a state where it can’t compile without numerous can’t find library errors.Update 3/1/2022.. I was using [email protected] and it's actually [email protected] so that explains the delayed replies. I did get answers on where in the UNO V4 code to adjust the too-much-speed issue and the ESP32 code to switch Wifi channel rf frequencies but have not done either yet since at this point, after completely deleting ALL library folders and re-installing the IDE from scratch, now I can compile the V4.0 .ino without errors , upload and run the 4 ea demo examples without errors, but cant re-install the main (unmodified) factory V4.0 ino file and have it run properly, it appears to load with all the needed library files and Uploads without error, but will not run at all.. So it's broken and completely useless till we figure out what happened.. I have sent them a very detailed e-mail with the symptoms and hope we can resolve it soon..An update 3March 2022: [email protected] has been great. They did confirm the V4 main code is NOT compatible with either the Arduino UNO board manager 1.8.4 or 1.8.5.. and when I installed the 1.8.3, it auto removed the 1.8.5 And properly installed 1.8.3 and that restored the factory main board so it would fully run again in FPV mode . I also modified the line needed to control the max speed and set it to 100 and also 150 instead of 250 and now can more easily drive it around with out doing jerky wheelies and spinning in circles all the time..it’s still too sensitive and prone to spin in wheelies when turning tho.support answered most all my other questions tho and will send an update notice out when their code is made compatible with the latest Board manager release and IDE 1.8.19. It appears either using the copy/paste manual mode to add their 4 libraries, or the recommended AddZip option will work, but I prefer to use the recommended AddZip way and they may change their ReadMe1st.pdf install guide to reflect that too.All in all I think the robot is a great way to expose kids to Robotics and advanced Arduino programming, and it’s fun but as a teaching tool to teach programming, Elegoo’s other learning kits are a LOT simpler and more effective in teaching programming skills especially for beginners.. this code in the robot is VERY complex and difficult for a novice to debug or understand since it’s tightly linked to the integration of the Elegoo App on your tablet, the ESP32 CAM and it’s WiFi, and the UNO R3 board and it’s got a complex control structure that’s too deep for beginners.But it’s perfect for me and so I bought a 2nd one so I can tweak and mess with / mod the code in it at the same time the kids can play with the other one.. we’ll be racing each other soon..update 3-8-2022: the vendor's [email protected] line has been fantastic.. They just sent me an update which not only translated all the comments that were in Chinese to English, but moreover the code now both compiles and runs under IDE 1.8.19 with the latest AVR UNO Board Rev3 1.8.5 version board code. They have helped me a lot and sent a table listing all the UNO Digital and analog pins that are used, and have answered all my questions so far..Unfortunately almost All the Digital, serial I2C and Analog pins are already in use on the UNO so to avoid both the I/O conflicts and the huge problem integrating add-on features like a Laser under servo control and the grabber arm I plan to add a stand alone ESP32 and control it with a second IOS App , or by using a spare RC receiver and it’s RC transmitter one way or the other. I don’t think that will be hard to control since one kid can drive and the other shoot the laser at targets or switch controllers. Integrating new code using the existing ESP32 and Elegoo IOS App is just too difficult to do for me as a non-programmer.
TrustPilot
4天前
1 个月前