We remain fully operational. Our teams are working around the clock to ensure your deliveries continue safely.

下载应用程序


Buy anything from 5,000+ international stores. One checkout price. No surprise fees. Join 2M+ shoppers on Desertcart.
Desertcart purchases this item on your behalf and handles shipping, customs, and support to SINGAPORE.
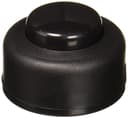
🔘 Step into simplicity with Satco’s vibrant push-button switch!
The Satco 80-1163 is a compact, contemporary step-on push-button switch featuring a 1 Amp current rating and 125 Volt operating voltage. Designed with durable brass contacts and a normally open circuit, it offers reliable, touch-controlled ON/OFF functionality ideal for professional and home environments.
| Operation Mode | ON-NONE-OFF |
| Current Rating | 1 Amps |
| Operating Voltage | 125 Volts |
| Contact Type | Normally Open |
| Brand | Satco |
| Terminal | Screw |
| Item dimensions L x W x H | 10 x 10 x 10 inches |
| Circuit Type | 1-way |
| Actuator Type | Push Button |
| Contact Material | Brass |
| Number of Positions | 2 |
| Control Method | Touch |
| Connectivity Protocol | X-10 |
| Color | color |
| Wattage | 2.5E+2 |
| Unit Count | 1.0 Count |
| Number of Items | 1 |
| Global Trade Identification Number | 00045923811630 |
| Manufacturer | Satco |
| Controller Type | Push Button |
| UPC | 045923811630 |
| Part Number | 80-1163 |
| Item Weight | 0.8 ounces |
| Product Dimensions | 10 x 10 x 10 inches |
| Item model number | 80-1163 |
| Is Discontinued By Manufacturer | No |
| Style | Contemporary |
| Item Package Quantity | 1 |
| Number Of Pieces | 1 |
| Measurement System | Imperial |
| Included Components | Satco 80-1163 Step-On-Button On/Off Push Switch |
| Batteries Included? | No |
| Batteries Required? | No |
| Warranty Description | Contact manf for warranty info. |
M**D
Not Industrial, but More Robust than Modern Christmastree Switch/Cords
I used this with a standard three-wire round insulated extension cord (ground, hot, neutral cased in black rubber). This might not look nice with a smaller diameter cord (standard visible two-wire lamp cord) as the case openings are large.There were no instructions, but the switch was easy enough to figure out, especially if you've installed chord switched before. Simply remove 1" of insulation encasing the wiring without cutting the interior wires. Isolate ground and neutral wires (determine by using online color coding chart). Cut single hot lead, and strip 1/4" from clipped hot wire ends only. Insert cut ends in to the two different contact holes. Tighten screws. Direct/part ground and neutral leads around center switch that contains secured cut hot lead. Ensure switch spring and chord is seated correctly at case holes, click casing closed over insulated chord.This would probably not be good for industrial or machine shop applications. It is more robust than a Christmas tree foot switch, but not as nice as a much larger shop foot/pedal switch. This works fine for cutting the power to a small motor, and would work well for a lamp with beefy chord.
O**Z
Answer to my prayers
After the step switch broke on my floor lamp, I was looking to purchase a replacement locally and couldn't find anything. This fit the bill PERFECTLY. Decent quality construction although I do think it would break if you accident put the entire weight of your body on it when pressing down with your foot. super easy to install, and has been working well. Comes with instructions. I should mention that I actually don't use this floor lamp very frequently so I can't say yet how it will hold up to the test of time. But overall seems to be good.
A**N
A great little switch, especially for under-the-desk appliances and plug ins !
This is a really sweet deal !! I have a foot warmer under my desk for some of the cold winter days when I am working from home, and I used to keep bending under my desk to turn the heater on and off. I would hit my head or back on the desk when getting back out from under it. This little beauty solved my problem great !! It took just about 10 min (maybe less) to split the wire going from the heater, cutting one wire shorter than the other, wiring it together and getting it all tight and shut. Now all I gotta do is step on the button to turn it on, and when I am done, or it gets too warm, just another tap, and its off !! Works great !!
P**.
Shody construction, missing parts, difficult to install
I received this with the two brass pieces (wire restraints) missing. I returned it, and promptly got a second switch, also missing those parts. I decided to install this on a lamp cord nonetheless. Mindful of the helpful online instructions I was able to wire the exposed contacts to the rectangular switch block. No help from the enclosed instructions here, there were none. Before assembly, switching worked as designed. But after assembly and seating top plastic piece over bases, the pushbutton no longer had adequate motion to trigger switch on and off. After much consideration and many trials I discarded the helical spring that was meant to surround the pillar of the internal switch. That left adequate vertical play for the pushbutton to toggle on/off action. The internal switch is spring loaded- no apparent need for an additional spring that just gets in the way. I am left with a working but precarious switch, due to the absent strain relief parts. A genuine mess. But at you own peril.
B**H
A little tough to wire but works as expected
I got this switch to replace a failing switch on an Ikea floor lamp. I am very happy with the switch as a switch that isn't working consistently has to be one of the most frustrating things to fight with you need light in the middle of the night to change a crying baby's diaper :-). Anyway, was having some trouble wiring it as it was tough to get the non-switched wire to fit inside the housing without interfering with the switch. I saw others were having trouble too based on other reviews, so I felt better and was able to figure it out. I posted a picture of how I wired it that worked.Also even after I got the wire to sit properly, the switch wasn't fully snapped into the bottom of the housing which caused the switch to not work. However, once I figured all those things out, everything works fine and I am very happy with the switch.
Y**G
Took 10 minutes! Remember to UNPLUG YOUR APPLIANCE FIRST!
This should be a no-brainer, but if you don't know to unplug your appliance first before attempting to install this switch, then maybe you shouldn't be trying to install this yourself then :P.That said, I'm not super technically savvy, but it was easy enough for me to figure it out! It only took 10 minutes. The switch is simple, it is a simple open circuit when you press down the circuit closes.Step 1:Unplug the chord.2: Find the place on the chord you want the switch to be, and poke a hole in the chord between the two joined lines. Pull the two chords apart for about an inch.3. Cut one of the chords and (important) remove about half an inch of the length.4. Strip both ends a quarter of an inch and insert them into each side of the switch and tighten the screws onto the ends.5. place both ends of the chord in the retaining claps and screw them tight.6. Install the top of the switch over and snap it into place. Easy!
TrustPilot
3天前
1 周前