We remain fully operational. Our teams are working around the clock to ensure your deliveries continue safely.

下载应用程序


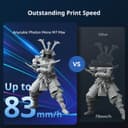


🚀 Print Big, Print Fast, Print Flawless — Own the Future of Resin 3D!
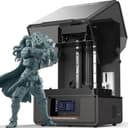
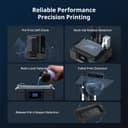
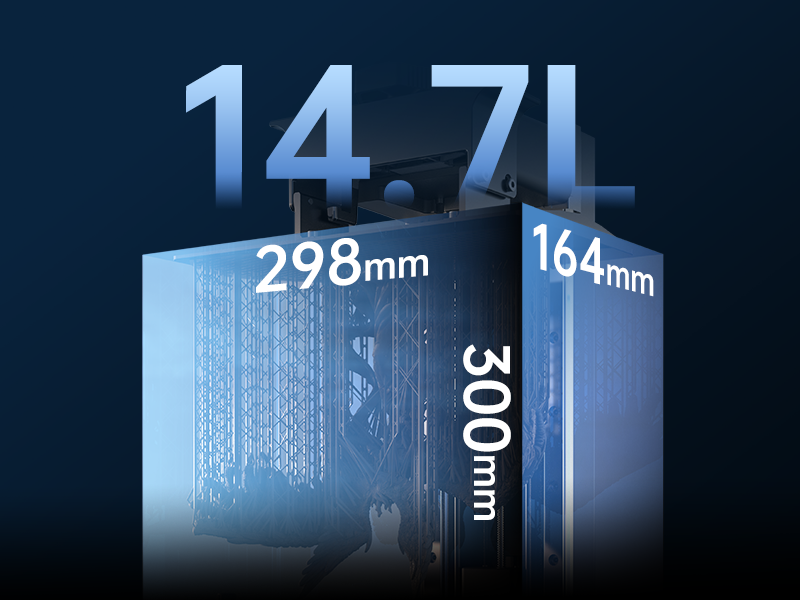
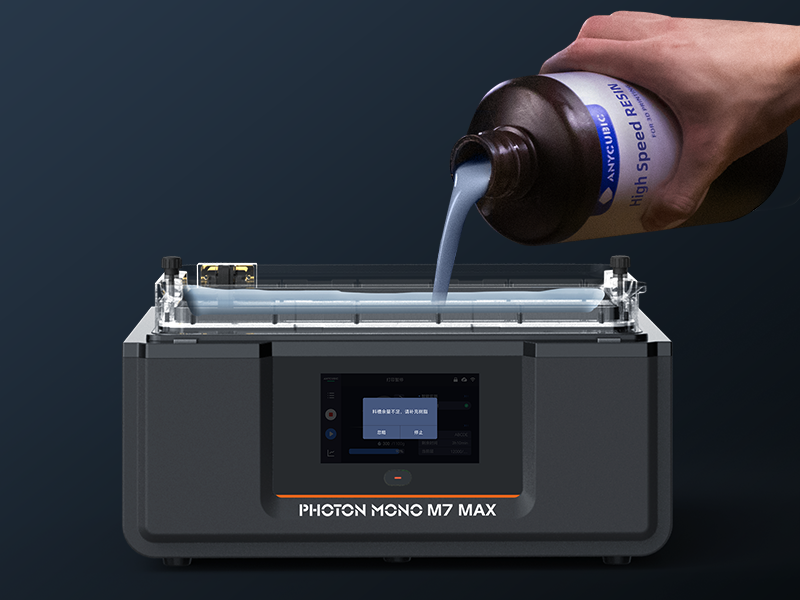
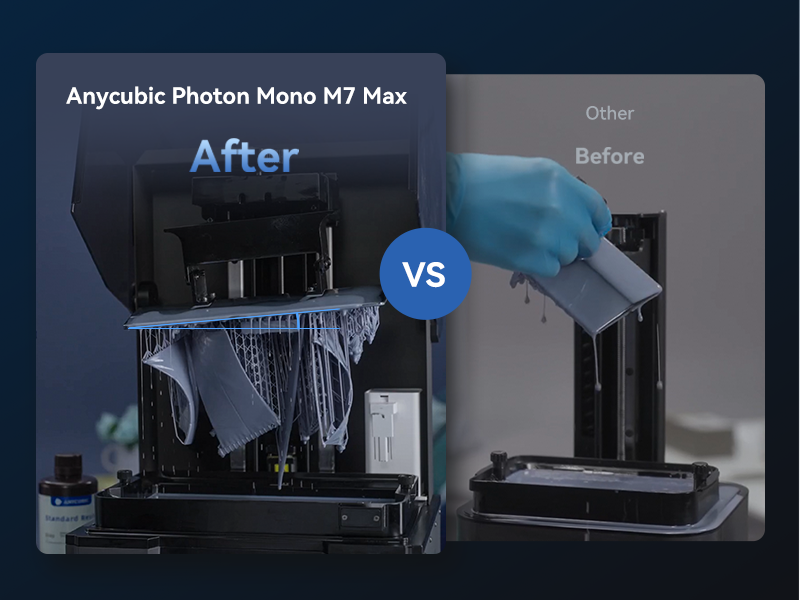
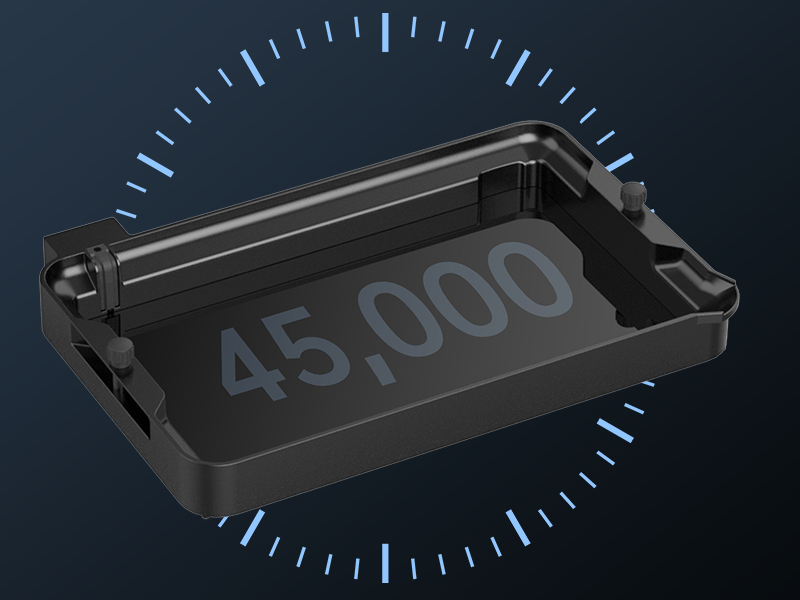
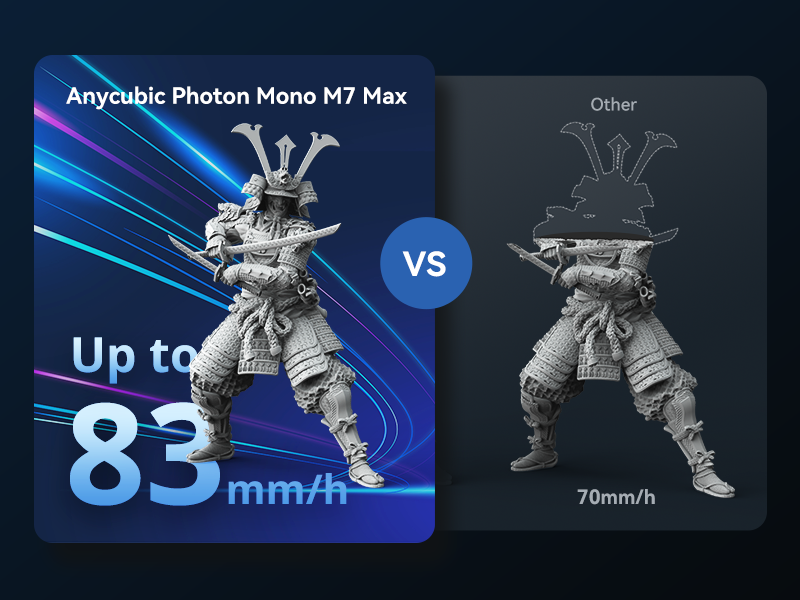
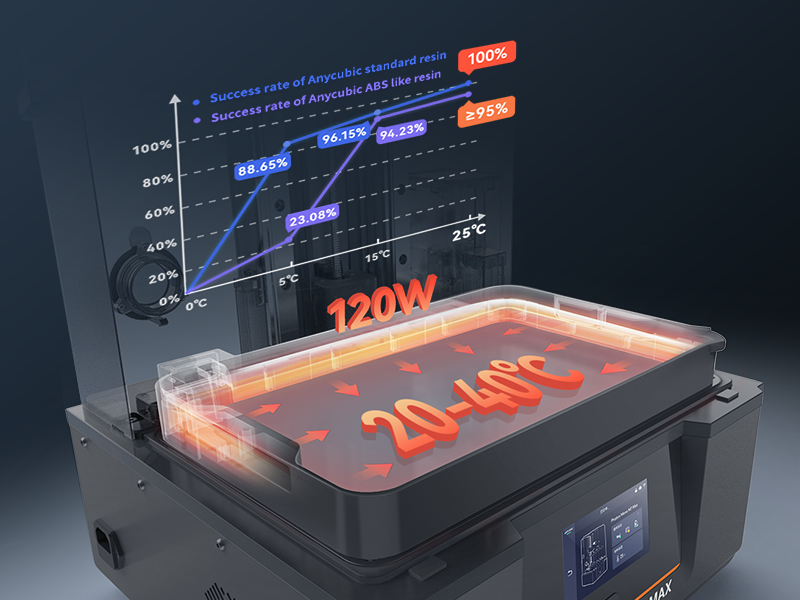
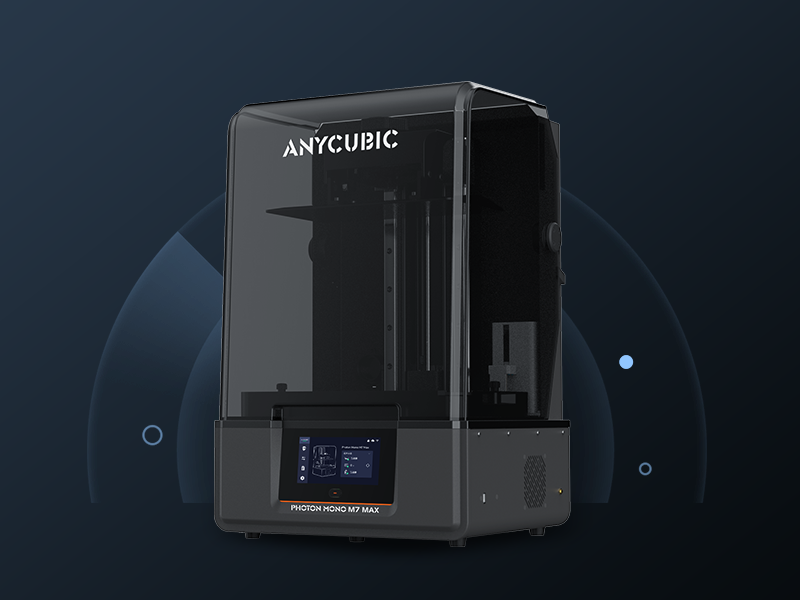
The ANYCUBIC Photon Mono M7 MAX is a powerhouse resin 3D printer featuring a massive 298×164×300mm build volume and ultra-high 7K resolution with COB LighTurbo 3.0 lighting. It boasts a blazing 60mm/h print speed, dynamic resin temperature control, and smart resin auto-fill and reclaim systems. Designed for professionals and enthusiasts alike, its flip-open cover and intelligent speed enhancements streamline your workflow, making large, detailed prints faster and easier than ever.


| ASIN | B0DB8BF7R3 |
| Best Sellers Rank | #38,107 in Industrial & Scientific ( See Top 100 in Industrial & Scientific ) #55 in 3D Printers |
| Customer Reviews | 3.3 3.3 out of 5 stars (69) |
| Date First Available | July 26, 2024 |
| Item Weight | 62.8 pounds |
| Item model number | Photon Mono M7 Max |
| Manufacturer | ANYCUBIC |
| Product Dimensions | 20.47 x 20 x 31 inches |
M**A
What they said!
Read the reviews. "Wow" "Excelente" "Muy Bueno". That about sums it up. This is truly an exceptional machine and I'm just fully tapping into its full potential. I've had mine a few months now. It was a rough start. The LCD screen was out in one section on the start up test, though this was likely shipping damage. Anycubic was immediately responsive and within 2 emails I had a new LCD replacement kit in a few days. The swap was very easy and I was off and running. I'll note that I've had an Anycubic Photon M3 max for about 3 years. Possibly the best one ever made. I've used it for small scale production of some finished parts, and it has been bulletproof and paid for itself many times over. Just before buying this one, I upgraded it to ACF film, jacked up the print speeds and it was fully next level and I was smitten. Yet even from that point of view, the M7 has totally blown my mind. It prints ridiculously fast. You can't believe it when you see it. Yet it produces mind blowing accuracy. You can only see layer lines on flat surfaces. Anything with texture blends them out and it looks as good as molded. Your prints actually shine. Compared to even my M3 Max on steroids, it effortlessly outperforms it. With the equally amazing Pro2 resin, 12 hour prints barely take 5 now. And they're just gorgeous. Also the build plate is massive. So you can fit even more prints on a plate than even the M3 max. Altogether this slashes time tremendously. So when prints are done there's a little hangy thing for the build plate, and a button in the software that lets you raise the print bed 50mm in one tap. This lets you hang the plate under the platform frame at a diagonal so excess resin drips away quickly. The plate goes on and off easily and the removal process is the same as any resin printer's. BUT THEN...the star of the show. The resin sucker. It has a resin sucker! You go into the post print 'cleanup' menu and tap 'retrieve'. A little tube and sensor drop down and suck the resin out of the vat into the autofill bottle. Its not crazy fast and you have to help steer the resin towards it with a spatula a bit, but it will eventually suck the resin vat almost completely dry. The cleanup from there is negligible. Its amazing. I dump the resin from my M3 in there too. 95% hands free cleanup. The flip down lid is a great touch too. The cover for my M3 Max is huge and I never have anywhere to put it when I open it. This one flips pretty easy and stays up when you want it to. It also drowns out pretty much all of the motor noise. That said the internal exhaust fans on this printer are definitely loud. Overall its louder than my M3. Not offensive, and not as loud as an FDM printer, but definitely noticeable. As far as software interface goes, I admit to having my own weird preferences about things, but overall the software is pretty solid. I never had any issue intuitively finding the features or settings I wanted, and most everything is explained. Same with the Workshop software. I was pretty used to the M3s Workshop and didn't feel great about the new version at first, but its actually much better once you get into it. Slightly less user friendly (to me), but far more capable. Once you get the hang of it its powerful. I really just have almost no complaints about this printer. Besides that the wash station is kinda junk, but that's a different review. I can't yet speak to its durability, but the durability of my last one paid for this one, so I'm optimistic. For the price, this machine is just so capable and powerful it reminds you you live in epic times! Get this thing and get ready for some BIG fun.
A**N
Poorly built printer, terrible support, terrible smell, terrible software, just.. terrible
[Update 03/2026] Software fails to update; the update text window doesn't have scroll bars which makes reading the update details impossible. The software is still horrible to work with, it's hard to believe it was released in this state. You're still forced to login to their website to print locally, can't access 'workshop' without doing that. It seems AnyCubic wiped user account passwords on their site without notification to the users, not a big deal but annoying nonetheless. Sites like Meshy and other 3d modeling sites do not support AnyCubic for some reason which is another reason to not buy this printer or use the AnyCubic software. Printer: I've had it for since 07/2025, printed roughly 6 small items, fast forward 8 months, I use the printer about once every 3 months for little things. It has hardware related problems, it's a ton of work from start to finish. It's not worth the price or effort involved. I would not have purchased this 3D printer had I known how bad it is. [Initial experience] Fairly easy to setup since I watched a youtube video prior to opening the box, not many parts to deal with. Weighs a ton, very heavy printer while it's in the packaging/box, not so bad outside the packaging but still heavy Larger/Taller than expected vertically Able to scale small .stl models to very large size and print in one go, so that's nice. Multiple small part prints not necessary (small printers require you cut the model up into multiple parts for printing, not this monster). [Unexpected] This printer requires a larger bottle of resin so skip the 1KG and go for the next size up, the good thing is that when the print is done, the pump will auto reclaim the unused portion of resin into the original container/bottle. You CAN technically use a 1KG bottle BUT, it will complain and give a warning about 'out of resin', you can safely ignore that if your print is small OR switch out to a 2nd bottle. Very smelly, it's not too bad in a well-ventilated room (AC + ceiling fan), an external vent is really advised, something like what you use for a clothing dryer that vents heat outside. High speed resin is great, but costs ~50% more and also speeds up the print time by ~30 to 50 percent. [The Bad] Photon Workshop Software slicer is poorly implemented, doesn't accurately communicate with the M7 Max. Typically says 'Printing Waiting, unknown reason' BUT the printer is actually printing and working as expected. The software also doesn't allow you to select your resin type, normal, tough, high speed, ect. It's a barebones slicer software, get's the job done but just barely. Strangely AnyCubic's last update for the software was 6/2023 AND it's being hosted on a google drive account. Each update to the software requires a whole new install rather than updating so my settings are getting lost each time. The phone app seems to be the software they want to support and push out. The Photon Workshop software for PC seems to have been abandoned, problem is that I want to use my 52" screen rather than the tiny phone screen when working with the slicer.
S**R
Easy setup, easy to use, WiFi option is great!
Fantastic printer! Prints fast and accurately, the heater and autofill are great options. I’ve printed full size masks, parts for helmets, and miniatures with great detail. I love sending the file directly to the printer via WiFi!
D**O
Súper impresora!..