We remain fully operational. Our teams are working around the clock to ensure your deliveries continue safely.

下载应用程序


🚀 Cool, Fast & Ready to Work — Your SSD’s New Best Friend
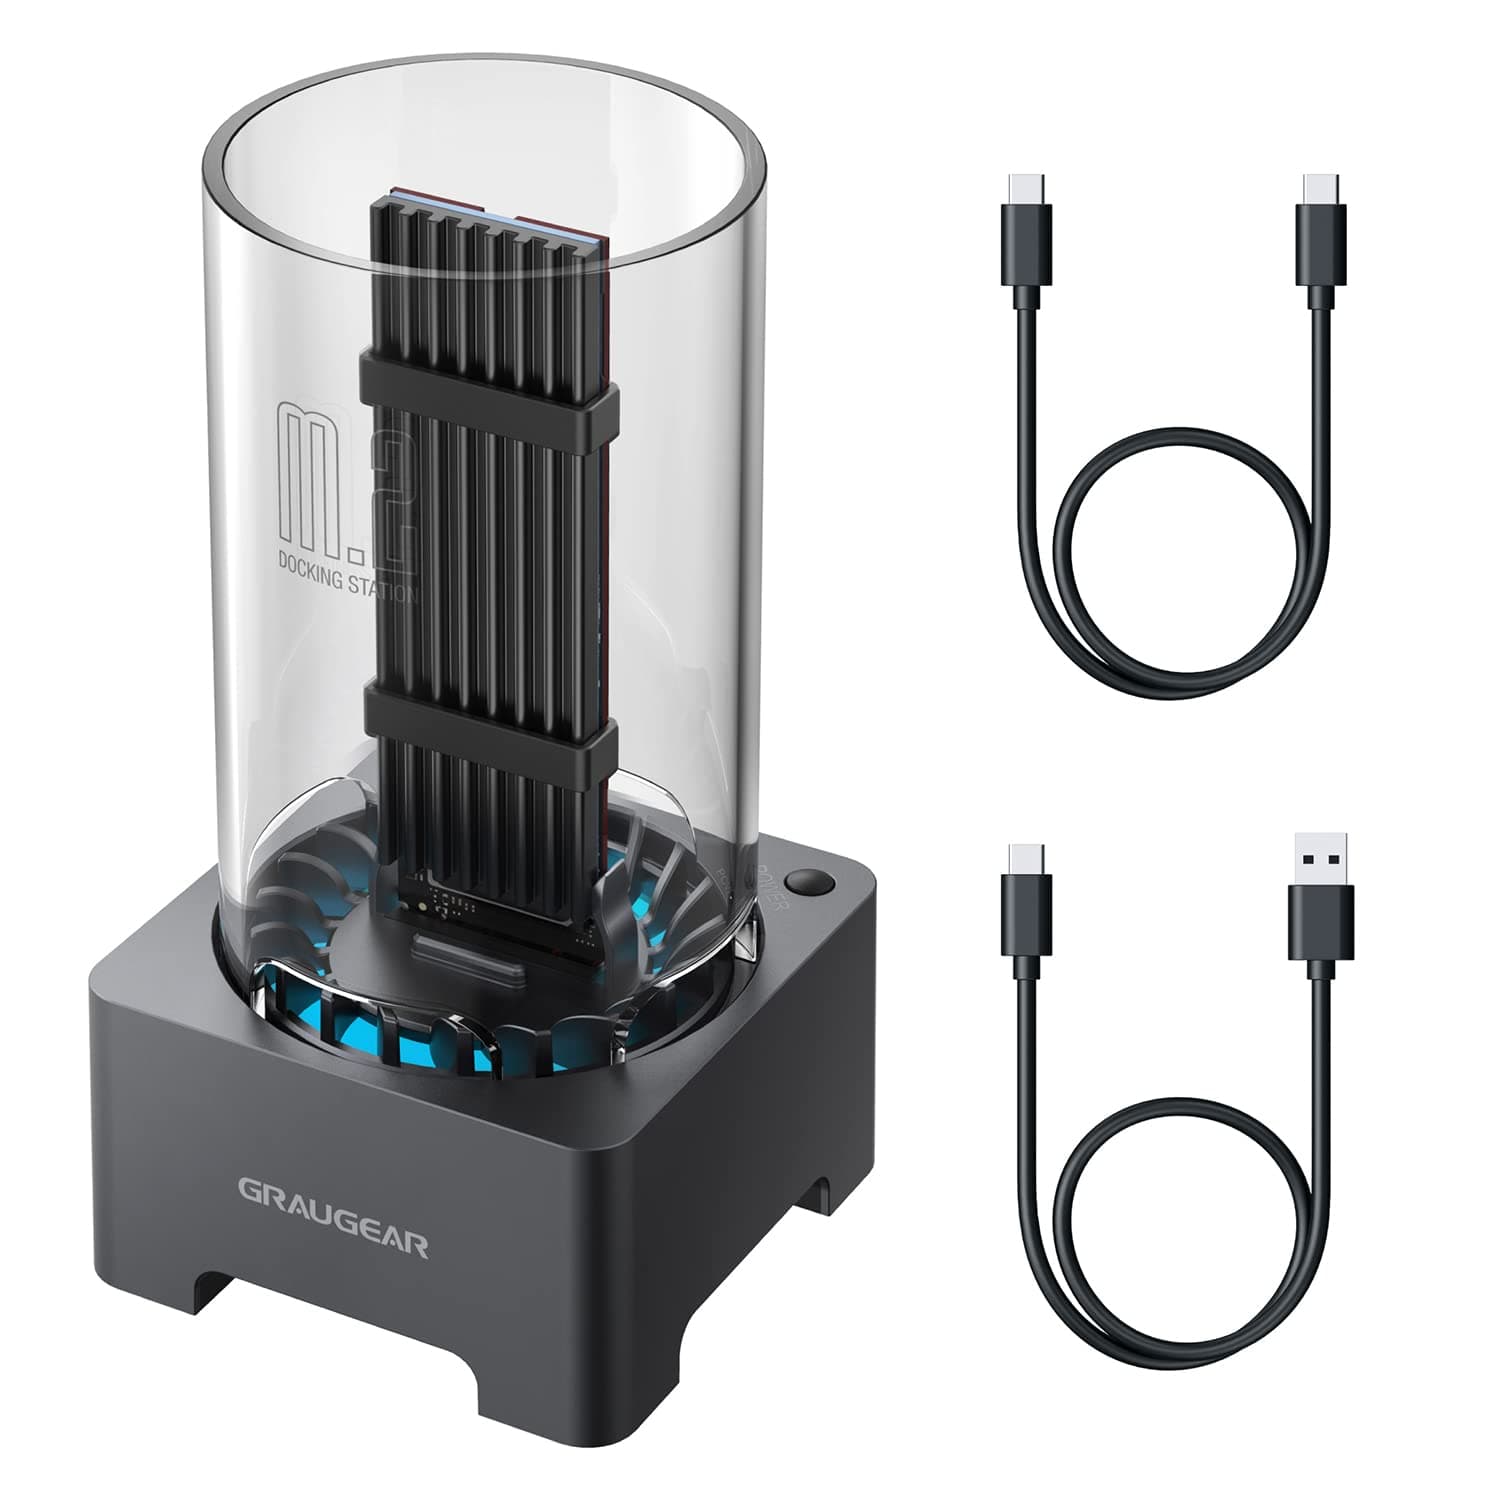
The GRAUGEAR M.2 NVMe SATA PCIe SSD Enclosure Docking Station delivers blazing 10Gbps USB 3.2 Gen2 speeds with broad M.2 SSD compatibility and advanced thermal management via a built-in cooling fan and aluminum heatsink. Its tool-free design enables quick SSD swaps, while the RTL9210B chipset ensures data integrity with multi-protection and support for UASP and TRIM. Compatible across Windows, macOS, Linux, and Android, this dock is the ultimate portable solution for professionals demanding speed, stability, and convenience.


| ASIN | B0BD4ZWF9M |
| Best Sellers Rank | #99 in Enclosures |
| Brand | GRAUGEAR |
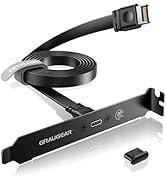
| Built-In Media | GRAUGEAR M.2 NVMe SATA PCIe SSD Enclosure Docking Station, USB-C to USB-C/USB cables, aluminum heatsink, thermal pads, rubber rim, instruction manual |
| Color | Black |
| Compatible Devices | Desktop, PC, Laptop, MacBook, PS5, PS4, iPhone, iPad, Smartphone, Tablet |
| Customer Reviews | 4.3 4.3 out of 5 stars (538) |
| Data Transfer Rate | 8000 Megabits Per Second |
| Enclosure Material | Plastic |
| Hardware Interface | USB 3.2 Gen 2 |
| Hardware Platform | USB-C, M.2 NVMe SATA SSD Docking Station, USB 3.2 Gen 2 Type-C, USB 3.1 Gen 2 Type-C |
| Item Dimensions L x W x H | 2.24"L x 2.24"W x 4.45"H |
| Item Weight | 10 Grams |
| Manufacturer | GRAUGEAR |
| Memory Storage Capacity | 8 TB |
| Supported Devices Quantity | 1 |
| Warranty Description | 12 months |
P**R
Tested on WD BLACK, Samsung 980 NVMEs and TeamGroup SATA. Works Fine
After trying two AMZ Pilot Docking Station SSDs that couldn't even mount the drives reliably, I decided to spend $20 more and try this. After all 2 separate trips to Amazon GO to return plus all the hassle was worth $20. This unit has several key necessary things I never realized I needed until trying the AMZ units. 1) The M.2 connector has to be good quality and it must effectively support the drive physically. Any issues with the connector means massive reliability issues. Since the SSD sits vertical and isnt supported, it tends to tip. It literally falls out under its own weight if moved. Bump the table, drive disconnects. Temperature changes, drive disconnects. 2) Small fan, like it or not, really keeps the drive cool. My Samsung unit never exceeded 35C after 100% sustained benchmark running for an hour without any heatsink. Even the smallest amount of direct airflow really seems to make a difference. Pros: 1) The unit comes with plastic retaining tabs that support the SSD in the vertical position so it doesn't move. I dont know how many repeated insertions/removals before it weakens, but it seems okay for the few dozen times I will likely change drives. I just cant afford that many SSDs. 2) All my drives, WD Black SN850X, Samsung 980 Pro and TeamGroup SATA 3 ran around 450 MB/s using USB 3.2 Gen 2 port. Very respectable, but about 10x slower than direct attaching via PCIE 4.0 slot. I wish it would run faster but I think this is the reality of USB. I cant say for sure. Its great for backing up, restoring or simply testing an SSD but i wouldnt run it like this permanently unless you are out of PCIE slots. 3) Drives run cool. I know they provide a heatsink but i wanted to push the docking station to test robustness. 4) I have had ZERO disconnects, ZERO thermal throttling. Cons: 1) You cannot flash update using this controller. Both WD and Samsung wont allow it. All i can guess is that this was not an expected use case and no one wrote code to support it. You can run WD dashboard but it reports "other drive" 2) Need Aura sync lighting option. Spent all this money on a gorgeous setup and the unit only has a simple non-intrusive blue power LED. Maybe a special edition version some day. Now I'm hoping now they decide to release a dual slot SSD so I can clone without having to rip open my case.
J**E
Works well but needed to be modified for my application.
The boot drives for my desktop and laptop computers have heat sinks permanently attached to them. Normally, when I need to externally attach an M.2 NVMe drive to a computer, I put it in an external enclosure without the cover or thermal pad attached. However, my boot drives won't fit in that enclosure or any other ones I have. This dock is one of the only two I found that would allow me to plug my boot drive into and have a way to support them after I modified it. The fifth picture shows my boot drives. The bottom one is actually in a tray that slides into a dock on the back of my desktop computer for easy access (instead of having to halfway tear down my computer to get to it). Because of the thermal pads and compound inside, removing the drive inside would be difficult and messy. The top one is for my laptop (fortunately, easy to access). Its heat sinks are permanently attached. To be able to support these drives so they won't flop over, destroying the drive's connector, I had to modify the clear plastic "chimney". First, in the sixth picture, I had to cut away the wind vanes on each end of the socket in the base and the little retaining clips on each end of the socket to accommodate the width of the larger boot drive. After that, in the fourth picture. I shortened the "chimney" by one inch, made a plastic disk with a slot and two notches to clear both boot drives, then cemented it inside the top of the "chimney" as shown in the third picture. The first three pictures show the boot drives installed in the modified dock. The fit around the drives is loose enough, plenty of cooling air should still flow over the drives. I didn't bother with the included heat sink. I already had heat sinks installed on the boot drives, the included heat sink is too light for my needs and only cools one-sided SSDs, and I don't trust the elastic bands holding the heat sink to the SSD to last very long. The "chimney" will lock into the base, although it is more a friction fit than being locked. I'm going to leave the "chimney" attached when the dock isn't in use to avoid wearing out the fit. I didn't check for speed. I'm not concerned about that since I won't be using the dock very often, maybe once (or twice?) a year. As long as it works, i can be patient if needs be. My only complaint is the location of the on/off switch being on the side where the cable plugs in. It's a wee bit awkward to reach. Update: I just discovered this dock is TRIM compatible in Linux (I use Linux Mint) but you will need to created a udev rule to enable it. Here are the directions for creating a udev rule to enable TRIM compatibility in Linux Mint, etc. 1. Verify the Vendor ID and Product ID. Run lsusb in the terminal with the device plugged in. If you aren't sure which device in the list is your SSD, unplug it and run lsusb again and see which device disappeared. (Don't forget to unmount the filesystem before you unplug it.) Every device has an ID value in the list. For example, the ID for this enclosure is “0bda:9210”. The Vendor ID is the first part and the Product ID is the second part. My enclosures have the Realtec chips in them. 2. Create a udev rule. In the terminal, copy and paste this line and hit Enter. sudo nano /etc/udev/rules.d/50-usb-ssd-trim.rules Type in your password, then hit Enter again. Copy and paste this rule into the text editor (all one line; the correct IDs for this enclosure has already been added): ACTION=="add|change", ATTRS{idVendor}=="0bda", ATTRS{idProduct}=="9210", SUBSYSTEM=="scsi_disk", ATTR{provisioning_mode}="unmap" Pressing CTRL+O, then ENTER, then CTRL+X will save and close the file in Nano. Now, the next time you plug in your device via USB, TRIM should work.
D**R
I love the build Quality and works perfectly fine. Also does not take up too much desktop space. Really looking looking.
M**T
I got a few spare SSD as M key and B+M key, like 128GB and 256GB; these aren't worth selling to others. I found this gadget from a product review, so I tried it. It works with both M key and B+M key M.2 SSDs. Lightweight, good-looking and super easy to use. No tools or screws are required. I love the blue light from the bottom and the cooling fan also. One unusual thing is that you have to press the power manually after rebooting; I think that might be some protection mechanism. If you have some spare old SSD, it's worth trying it.
J**O
Produto de ótima qualidade.
D**S
Muy practico para conectar tus ssd m2 no se desconecte y mantiene fresco los discos sólidos y con su iluminación se ve excelente.
パ**ン
裸のssdを何個か持っていて手軽に利用できる方法を探していた時にこの商品にたどり着きました。 いや面白いですね、コレ ・良いところ USBで繋ぐだけで使えます。 USB-C出力で10Gbpsまで行けますね。実測値も10Gの上限1000MB/sくらいまできちんとでます。 付属のケーブルは30cmくらいでやや短め、USB-C to USB-A です。 ファン付きで下のファンから送風し冷却してくれます。 このデバイスを使用してファンが必要になるほど高負荷をかけるとも思えないですけどね まぁ冷えることはSSDにとって良いことですね。 若干ファンの音はしますがうるさくはありません。近づかないとわからない位なので私は気になりませんね。 スイッチがついていて抜き差しせずにONOFFできるのもいいですね。 ONの時にファンが作動、ほのかに青いライトが点灯されます。わかりやすくて光り方も好みです。 OFFでファンが停止、ライトが消灯します。もちろんPCからも切断されます。 ・良くないところ 完全に裸のSSDでは問題ないのですが、ヒートシンク装着していると厳しいです。 小型のヒートシンクであればストッパーを強引に突破して装着することはできます。(動画参照) 動作も問題はありません。 横にサイズが大きいヒートシンクではストッパーが割れてしまうかもしれませんね。 まぁでも割れたとしても差し込みができていれば動作自体は問題なさそうです。 この商品の特性上エンクロージャーのように持ち運びなどの利便性は失われます。 据え置きでの利用が望ましいですね。 ・総評 デメリットもありますが使いやすく、安全、安定感もありおしゃれで気分が上がるのでお気に入りです。
TrustPilot
1 个月前
2 个月前