📟 Elevate your Arduino projects with sleek, smart display power!
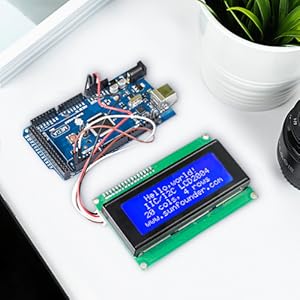
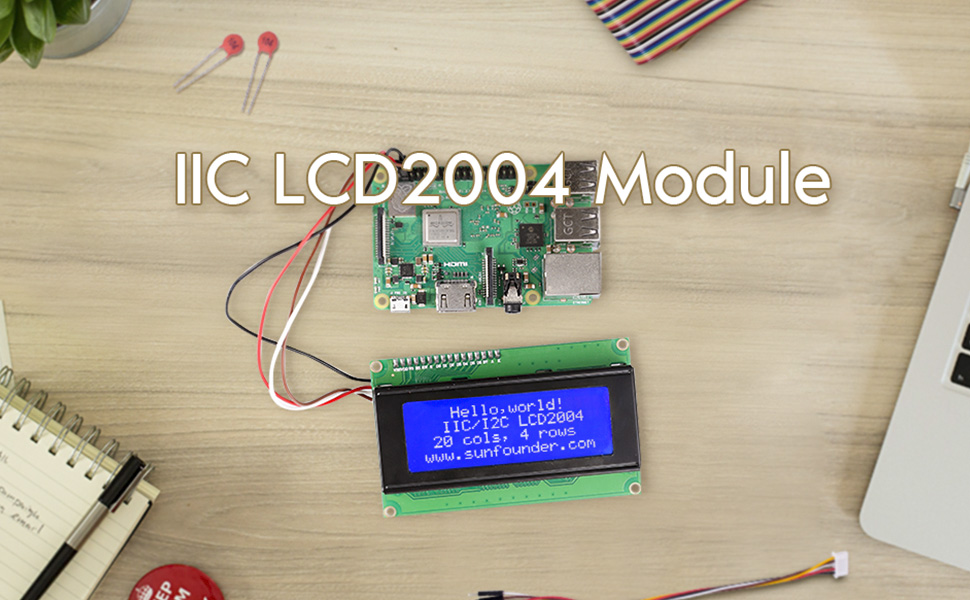
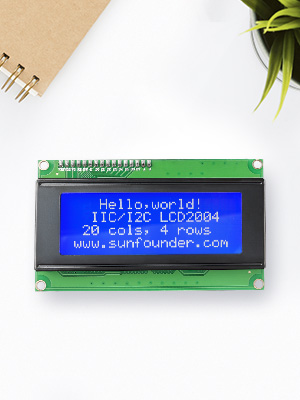
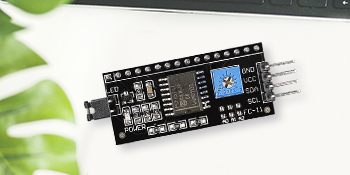
The SunFounder IIC I2C 2004 LCD Module Shield offers a compact 20x4 character display with adjustable contrast and a low-pin-count I2C interface, fully compatible with Arduino R3 and MEGA boards. Perfect for professionals seeking to add clear, customizable visual feedback to their embedded projects.

| Standing screen display size | 3 Inches |
| RAM | LPDDR |
| Brand | SunFounder |
| Series | 8541582407 |
| Item model number | 8541582407 |
| Operating System | Linux |
| Item Weight | 3.05 ounces |
| Product Dimensions | 7.5 x 5 x 0.2 inches |
| Item Dimensions LxWxH | 7.5 x 5 x 0.2 inches |
| Color | LCD2004 & I2C (1Pack) |
| Processor Brand | Atmel |
| Number of Processors | 1 |
| Voltage | 5 Volts |
| Manufacturer | SunFounder |
| ASIN | B01GPUMP9C |
| Is Discontinued By Manufacturer | No |
| Date First Available | June 7, 2016 |
J**.
Big, bright, easy to use I2C LCD display
Big, bright, easy to use LCD display. This is a 4 line by 20 character LCD display with a daughter card that provides a simple I2C interface. Ignore the portion of the product description that says this is a shield or intended for an Uno or a Mega2560. This display will work with any micro-controller that supports I2C communications (basically, all of them). To use this display you need to connect four wires: Vcc, Gnd, SDA, and SDC. You can have several I2C devices on the same I2C lines, so there is little reason to use anything other than the standard connections for your controller. I used an Arduino Nano which is slightly amusing with this display - the Nano is no larger than the I2C daughter card attached to the back of the LCD display, so it is dwarfed by the display. Load an I2C LCD library; I used the one from the vendor, see their page at wiki.sunfounder.cc/index.php?title=I2C_LCD2004. There also is a link to the spec sheet for the interface chip on the I2C daughter card they added to the display. I have not read it in any detail, but it looks like a fairly simple I2C to 8 bit parallel interface, which is what is needed to easily drive an LCD display like this. There is also a potentiometer to control display contrast (not brightness, just contrast). You will need to adjust that contrast if your drive voltage changes. I have attached a short video from this display; contrast is turned relatively high so you can clearly see the dots and character blocks. The video enters characters starting at the top right. Notice that at the end of the first line, entry moves to the third line, then to the second, and then to the fourth. I also ran the display shifting characters in from the right end of the first line (well, third line the way things actually work), although that is not shown. When shifting in from the right, entry starts at the end of the third line and characters shift up through the first line, then entry moves to the start of the fourth line and characters shift up to the second line. Things should work fine as long as you don't try to put more than 20 characters in a line, at which point expect to be confused. A very nice display that is very easy to use.
S**E
Worked well for my application
Worked out nicely on a speedometer I was building for my model railroad. Easy to see and adjust.
L**Z
Muy conforme
Excelente producto
K**L
Used with Cypress PS0C 5LP no problem
Despite the Arduino focused listing title, the display is Hitachi compatible using the PCF8574T (in my unit) I2C converter backpack that can work on other processor lines easily. I needed to hook it up to a Cypress PSoc 5LP eval board (CY8CKIT-059). Cypress provides many code examples and auto-generates APIs for library parts like parallel and serial graphics and text displays. The library worked fine with the parallel Hitachi displays including this 4x20. It did not work with this backpack and the I2C library supporting NXP PCF2119x commands. The solution was to find and use a community library (V2.1 as of this date). It also adds a few new functions to integrate position and string and char printing. The default address (no jumpers installed on A0-A2) is 0x27 (7bit), or 0x4E (8bit). The non T version of the PCF8574 may be 3F default. You need to pay attention to the header or library component address entry for which form of address, 7 or 8 bit, is required to be entered as the protocol shifts the address 1 bit position. It is also helpful to run a small routine to scan the I2C bus to see what shows up if yo have any difficulty. Check for the community code at the cypress community website, thread number 11727. The backpack is a common part and you can remove it and use it on other displays, in my case a 2x16 Hitachi compatible display. For a programmable backlight level I cut the trace on the 5V side (top side of board) of the backlight 2 pin header and wired a jumper from the now open pin up to pin 16 on the backpack. My PWM wire supplies 5V and switched ground on a 2 pin 0.100" center plug. I changed it on the backpack so it would work on any display it ever got moved to since not all displays have easy onboard backlight connections or configuration jumper pads.
R**M
Good for price.
Easy to set up, and works with the standard "LiquidCrystal_I2C" library. Contrast adjustable as described. 2 cons: 1) Red glow always from the top right and bottom left corners. Not bright, but there. 2) A long message line continues from line 0 to line 2, ie. it skips a line, then goes back to line 1, and then to line 3. Not sure if this is fault of the hardware, or the library driver. To note - if I place the cursor on a specific line, it prints the specified message there OK. See code below and video. #include <LiquidCrystal_I2C.h> #include <wire.h> // initialize the library with the numbers of the interface pins LiquidCrystal_I2C lcd(0x27,20,4); // set the LCD address to 0x27 for a 20 chars and 4 line display char message[] = "This is some long message that will end up scrolling on Line0 only"; int previous = 0; int pos = 0; void setup() { lcd.init(); //initialize the lcd lcd.backlight(); //open the backlight // Print a message to the LCD. lcd.print(message); delay(5000); lcd.clear(); } void printLine(int refreshSeconds) { //Check if the current second since restart is a mod of refresh seconds, //if it is then update the display , it must also not equal the previously //stored value to prevent duplicate refreshes if((millis()/500) % refreshSeconds == 0 && previous != (millis()/500)) { previous = (millis()/500);//Store the current time we entered for comparison on the next cycle lcd.setCursor(0, 0);//Set our draw position , set second param to 0 to use the top line char lcdTop[20];//Create a char array to store the text for the line int copySize = 20; // What is the size of our screen , this could probably be moved outside the loop but its more dynamic like this if(strlen(message) < 20) { //if the message is bigger than the current buffer use its length instead; copySize = strlen(message); } //Store the current position temporarily and invert its sign if its negative since we are going in reverse int tempPos = pos; if(tempPos < 0) { tempPos = -(tempPos); } //Build the lcd text by copying the required text out of our template message variable memcpy(&lcdTop[0],&message[tempPos],copySize); lcd.print(lcdTop);//Print it from position 0 //Increase the current position and check if the position + 20 (screen size) would be larger than the message length , if it is go in reverse by inverting the sign. pos += 1; if(pos +20 >= strlen(message)) { pos = -(pos); } } } void loop() { printLine(1); // Original program line lcd.setCursor(0,1); lcd.print("This is Line1 msg"); delay(250); lcd.setCursor(0,2); lcd.print("This is Line2 msg"); delay(250); lcd.setCursor(0,3); lcd.print("This is Line3 msg"); delay(250); lcd.clear(); }
P**O
After being on for a year or more, it still works fine.
I have been writing code for a greenhouse controller for over a year. LOL The display is always on to run a test or just remind me to work on the program. After being on for a year or more, it still works fine.
T**R
A device that works as expected, easy to use, lots of instructions and Arduino library online.
Great product. Go to the website, check out the video, downloaded the library, hooked it up to my generic Arduino using their guides. Before I even loaded the sketch the device sprung to life when the backlight was powered up displaying a default message. I could immediately see the LCDs were displaying well. I loaded the zip library from the website, loaded the sample sketch and ran it and bingo I saw their help world message. Updated it and Bam I saw my message. Googled how to create and display a custom character and did so. Vary happy with the purchase. If paying the price of a side of fries at your favorite fast food place doesn't phase you then I highly recommend spending a couple extra bucks to buy from these guys, and know you are getting something you can enjoy right away. I haven't tried powering this from a device running 3.3 volts but my 5 volt Arduino clone works great with this.
G**R
Great Value for a 20x4 I2C Display
Great value for a 20x4 I2C LCD. I will admit it took me longer than I expected to find the Arduino library for this display on their web site. Fortunately, other 20x4 I2C libraries will work with this display, which I used before I found the library for this LCD. It is also advantageous to be able to use the I2C interface of the Uno R3 board, which keeps other I/O ports available for external devices that don't have that capability. Here are my likes/less-than-likes about this display - Pros: 1. What's not to like about the cost of this display? There are other displays in the same category as this LCD that easily cost more than an Arduino Uno R3. 2. The contrast adjustment is built into the I2C board. No need to put together a shield with a dubious 10 kOhm potentiometer from another project. When adjusted properly, this display is as sharp as any I have seen in the white on blue displays. 3. Easy to integrate into a project once you find the right library files. 4. Open source library files for this display and interface type are easy to find; they do work with this display. 5. Build quality is surprisingly good. Cons: 1. Library files supporting this display specifically aren't as easy to find on the manufacturer's web site. I couldn't find a Downloads section on their site, but it seems they have a Wiki with download links to library files for their devices. Yes, this product is built in China. Some may find that problematic, some may not. If their build quality for all displays of this model is consistent with the unit I received, then I would not be uncomfortable getting more for other projects. If you are operating on a shoestring budget and need more room than a 16x2 display offers, this display may just be what you want.