🚀 Elevate Your Garage Game!
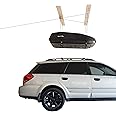
The HARKENCargo Box Overhead Garage Storage Hoist is a versatile and safe solution for maximizing garage space. Designed for easy one-person operation, it features a self-leveling design and an anti-drop system, ensuring your cargo box is securely stored. Compatible with all major brands and available in three lengths, this hoist is built with durable materials and comes with a 5-year warranty.
| Manufacturer | Harken Hoister |
| Brand | HARKEN |
| Model | 7803.16 |
| Product Dimensions | 29.72 x 22.61 x 7.87 cm; 2.13 kg |
| Item model number | 7803.16 |
| Manufacturer Part Number | 7803.16 |
| Special Features | Also perfect for ceiling storage of tents, cargo carriers, platforms, ladders, and many other space-hogging items |
| Item Weight | 2.13 Kilograms |
R**T
logical, straightforward and very high quality
best done with two people but works very well to hold two kayaks (stacked) and their trailers
R**O
200lb, Perfect for our storage needs
This is an excellent hoist. Considering doing other side of garage ceiling when the need for more storage arises. I built a custom size pallet to store some bulky items up high outta the way. Shopping and planning took a while (and painting). I took my time, to get it the way we wanted, and it took quite a bit of "time." Like others, am suggesting you too take your time for planning. Considered putting the pigtail bolts directly into rafters (and could have), but went with the recommended system structure (I mean, the hoist manufacturer recommends following the directions for a reason, right!!)? Regarding the instructions, IMO, the instructions are a bit choppy (some details were in some areas, but other details, for example, would be in an inset diagram). The information is there, just maybe not succinctly. Just take your time before drilling, and review install manual, then re-read prior to putting holes in wood or ceiling. Hope the pics give you some ideas along the way, as i reviewed others, and found maybe 3% of reviewers provided good images, and recommendations. The best guidance was from some youtube videos I searched long and hard to dig up. Technical Advice on Install: I found the 10 pc neodymium super strong magnets (easy purchase on Amazon) were extremely beneficial locating the rafter lines. The magnets find the nails in the rafters and stick to the ceiling attracted to the nail, so this helps you visualize the rafter line across your ceiling regardless if you have a stud finder or not. I do also recommend a stud finder to verify/confirm the center of the wood - but the magnets kind of get you started and help visually continue planning to bolt the 2x6's to the ceiling. One of my pics has the magnets showing what i'm trying to explain. For your precision lining up your mounting hooks to the ceiling pig tail bolts, recommend getting some string (cord) with a couple heavy washers, and holding that cord against your ceiling (while on your ladder), and seeing exactly where the corners of your object are, so you can precision mount your hookup points. After a week of marveling t my install project, I thought few a couple of *important* (for piece of mind) afterthoughts.... and took action to address them in the garage. This leads to another technical tip on this hoist, like I've seen others mention, once the hoist is in place and your object is overhead, the single welded eye (that the moving tackle and all the ropes attach to in the wall - a single bolt supporting all the weight of your object) does make you really desire (a lingering internal curiosity) to reinforce/beef up the single bolt that bears holding the weight into your wall.... so i have included pic of what i did to assist in securing the welded eye to my setup, and would imagine something similar could be done if coming straight out of your wall plate, with some wire rope eyes bolted to the plate on left/right side, fastened with lag screws and heavy duty washers. (So i took the welded eye 2x6 bolted into wall, took it down temporarily to adopt my support plan). Tensioned down the wire, twisted it once around, and secured it to another adjacent board i installed (see pic). The 2x4 i cut out pre-slots with skillsaw, so the wire rope isn't chaffing on the 2x4. All of this now holds the welded eye nice and tight, now in both directions. Once pallet hoisted in place, suspended in are, as another after thought, and for added piece of mind, i also added a paracord 550 (1/4" thick), with CamJam XT locking tie down tighteners on both sides (center 2 rafters) to ratchet off a little tension of the 4 main hoist lines, simply to take some tension off of the four main lines. This is a quick disconnect setup before we would lower the pallet, anytime we want to lower the pallet, just pull out the rope from the cam (on both sides, a quick snatch), and aweigh we come down. Again this was for extra insurance and piece of mind (see pic). Finally, want to mention your rope management (you'll want to ensure the extra rope is not in the way when your object is up in place), and we installed large cleats to line up a guide to ensure no snares or chafing; and to also both support the load, and to manage the excess rope that will be overflowing when you lift your object). We went with the 200lb capacity (posting the "review" both here, and separately posted on the 200lb hoist link), in the event we wanted to put a few more things up outta the way on the pallet. Again, from most reviewers posting here, i didn't see great images, nor tips to get around some tricky planning - so wanted to share. Pallet weight is 87 lbs, so we have plenty of space and weight to add onto the pallet if/when that should occur. Hope this review helped, and BTW, you'll be very pleased once you get this in place. Really happy with this hoist, and just what freed up lots of walking space in our garage!!! It's easy, but does take clarity of thought and planning - just take your time, and enjoy the project. You're going to go up and down ladder many times, and you'll go to the hardware store more than once - but you'll be thrilled when you hoist up your gear - you'll take pics and send to several of your buddies. Enjoy.
M**
Boat storage
Was easy and simple to set up works like a charm would recommend this to anyone.money well spent!
M**L
Complicated to install but does the job of prearranging the hardware you’d need for a simple lift
I’m generally pleased with the kit provided as it saves you from having to hunt down the hardware separately. That, of course, adds handsomely to the cost. The instructions are much too complicated for what is a fairly straightforward design. Functionally, the block in this kit is made for something much heavier than my rooftop box so it doesn’t descend easily when it release the jamb.
R**H
Works great!
Bought this for our tiny house to lift our bed up during the day as my office desk is underneath. It works great! Very happy!
TrustPilot
4天前
1 个月前