


❄️ Elevate your fridge, elevate your lifestyle.
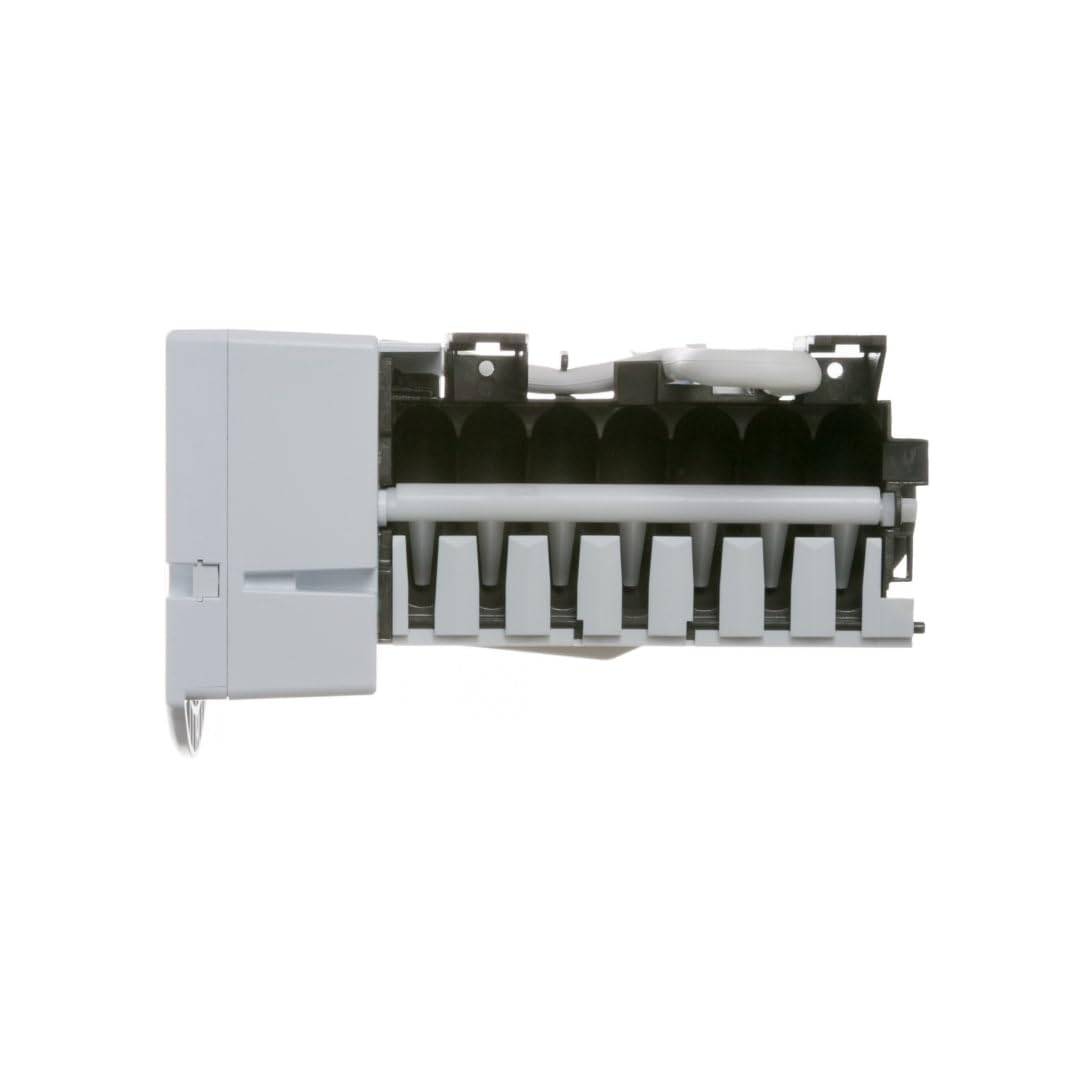
The GE WR30X10093 Refrigerator Ice Maker Kit is a genuine GE replacement designed to retrofit compatible refrigerators without built-in ice makers. With a compact footprint and 2-pound ice capacity, it operates on standard 110 volts and installs easily, backed by a one-year warranty. Ideal for busy professionals seeking convenience and reliability in their kitchen.


| Brand | GE |
| Model Name | wr30x10093 |
| Product Dimensions | 9.75"D x 5.25"W x 5.5"H |
| Capacity | 2 Pounds |
| Voltage | 110 Volts |
| Manufacturer | GE |
| Compatible Refrigerator Models | GE GTS17DTNRWW, GE GSS25JFMDWW, GE HSS25GFPJWW, GE GSS25JFMCWW, GE GSS25JFMBWW, GE HSS25GFPHWW, GE GSS20IEMBWW, GE GSS20IEMDWW, GE PSS26SGPASS, GE TFX20JRBKWW, GE GPE12FGKWW, GE HSS25IFMDWW, GE GSH25JSRFSS, GE HSS25IFMBWW, GE GSL25JFTABS, GE GSH25JSTASS, GE PSS25SGNABS, GE GSL25JFPABS, GE HSS25GFPAWW |
| UPC | 717449113948 795525611533 084691178996 029882551882 802253373876 |
| Global Trade Identification Number | 00084691178996 |
| Part Number | WR30X10093 |
| Item Weight | 2.9 pounds |
| Item model number | WR30X10093 |
| Is Discontinued By Manufacturer | No |
| Size | 1 |
| Color | WHITE |
| Item Package Quantity | 1 |
| Included Components | Single GE WR30X10093 Ice Maker Kit |
| Batteries Included? | No |
| Batteries Required? | No |
W**R
GE part wins again
After six years of flawless service, my GE ice maker just stopped. Period. Now I had two choices: pay Big Bucks to bring in a service tech, or hold my breath and "repair it myself." I knew from past (painful) experience that buying off-brand replacements could lead to disaster. So - a new GE ice maker ordered - delivered - and now, installed! By me! Without bloodshed or (too much) stress. Followed the included instructions - but not all of them. Fortunately, the new ice maker did NOT require ripping out one part and replacing it. Whew! The two parts I DID pull from the old and installed on the new were simple and fit perfectly. The entire project took less than 30 minutes.Been many ice cycles now, and GE wins again. Note to myself: never buy anything but original brand parts!
D**1
Worked like a charm after figuring out some stuff
After I received the Ice Maker I opened the box expecting a knock-off, but was pleasantly surprised when I noticed it seemed genuine. The directions were from GE. It worked after I got it installed. Here are some things to help:1) I could never unscrew the screws that hold the old ice maker in place to allow it to be lifted and yet keep the screws in the holes. So I ended up removing the screws. They dropped into the empty ice form of the old ice maker. To reattach, I used a 1/2" (about) strip of duct tape, forced the screws threaded end through the sticky side of the tape and then stuck the tape to the screw driver I used to re-install the new ice maker since it's was hard for me to reach in the freezer.2) To remove the power plug, there are clips on both sides of the plug. the one on your left is easy to see. The one on your right is very difficult. Use a long blade slotted screwdriver and insert it between the bottom of the hook you can't see and the metal base. Then twist in a clockwise fashion and it should come unhooked.3) After you remove the old ice maker, there are 3 parts you may need from it: A) The fill cup, which directs the water from the water tube into the ice making tray. B) Ice maker insert which if you consider the fill cup on the back, the ice maker insert is on the right side. C) the ice stripper. It's the white plastic piece in the front of the ice maker. You may need to replace the one that came with your new ice maker with the old one. It's a slight pain to install the old one onto the new ice maker. On the left hand side, there is a groove. On the right hand side, there is a short plastic axle. The stripper goes onto the axle first just slightly. Align the stripper to the left hand groove. About an 1" from the left hand groove, there is a piece of brown plastic from the tray. The stripper has a white piece of plastic 1" from the left hand side too. Your job is to make sure the white plastic piece is pushed into the left of the brown piece of plastic while making sure the white plastic piece remains on the axle.4) For reinstall, place the ice maker back about where it belongs. I chose not to install the screws next, but instead inserted the power plug in place. Because of the way the cord is bent on the plug side, you may need to bend it in a different direction prior to putting ice maker where it belong so you can plug the power in.5) As I mentioned above, rip off a 1/2" piece of duct tape and insert the screw threads through the sticky side. Then use the sides of the duct tape and tape them onto the screwdriver making sure the philips/hex end is firmly attached to the screw. Then push the ice tray into place and align one hole with the bracket and screw the screw into the hole until tight. The pull the screwdriver away from the screw and tape. The tape can remain there. It won't hurt anything. Do that for the 2nd screw.6) Now you're done after you turn on the ice making unit.I hope this helps.
K**A
Five Stars
Does Exactly What It's Supposed ToNo complaints here—this product works exactly as expected. It arrived on time, in good condition, and performed its intended function without any issues. Reliable and as described. Would purchase again if needed.
T**S
Replacement Ice maker for GE profile frig
MY ice maker went out about 6 weeks ago. I kept trying to figure out how to get it going and finally bought this item. It was much harder to plug in than expected which took us a very long time to finally get it in. The instructions report that you need to remove the striker plate on the new one and replace with your older one which looked hard to do and was not in any videos that I watched. On postmortem, the old ice maker had a broke piece of the striker plate blocking function. Needless to say, I didn't change the striker plate out and the ice maker is currently working better than the original ever did. We did manage to lose the original plastic nut on the left of the ice maker in trying to get the plug installed which makes me wonder why the hell they don't include a spare in the new kit. We cut up an old silicone watch band to make up the space as it must be level to work. Also, don't forget that if you have the side by side frig like we do, you will need to keep the funnel like piece where the water flows to the ice make as the space it has to travel is much greater than the replacement piece. It was well worth it to replace the ice make and this machine is an excellent replacement. I am keeping my old ice maker for parts if we have trouble in the future as I am pretty sure it is fully functional once I removed the striker plate piece that was blocking the little arm that pushes the ice out. BTW we also replaced the water valve on the back before we did the ice maker replacement which was also more difficult than expected as all the little bolts were different sizes. I do strongly recommend this particular replacement as it functions well, make good ice cubes. It will be more like your GE frig original than the after market ones.
J**O
Cold as ice
Works as it should. Makes ice quicker than the original which is nice. Very easy to install.
