


Transform your kitchen waste game! 🌟
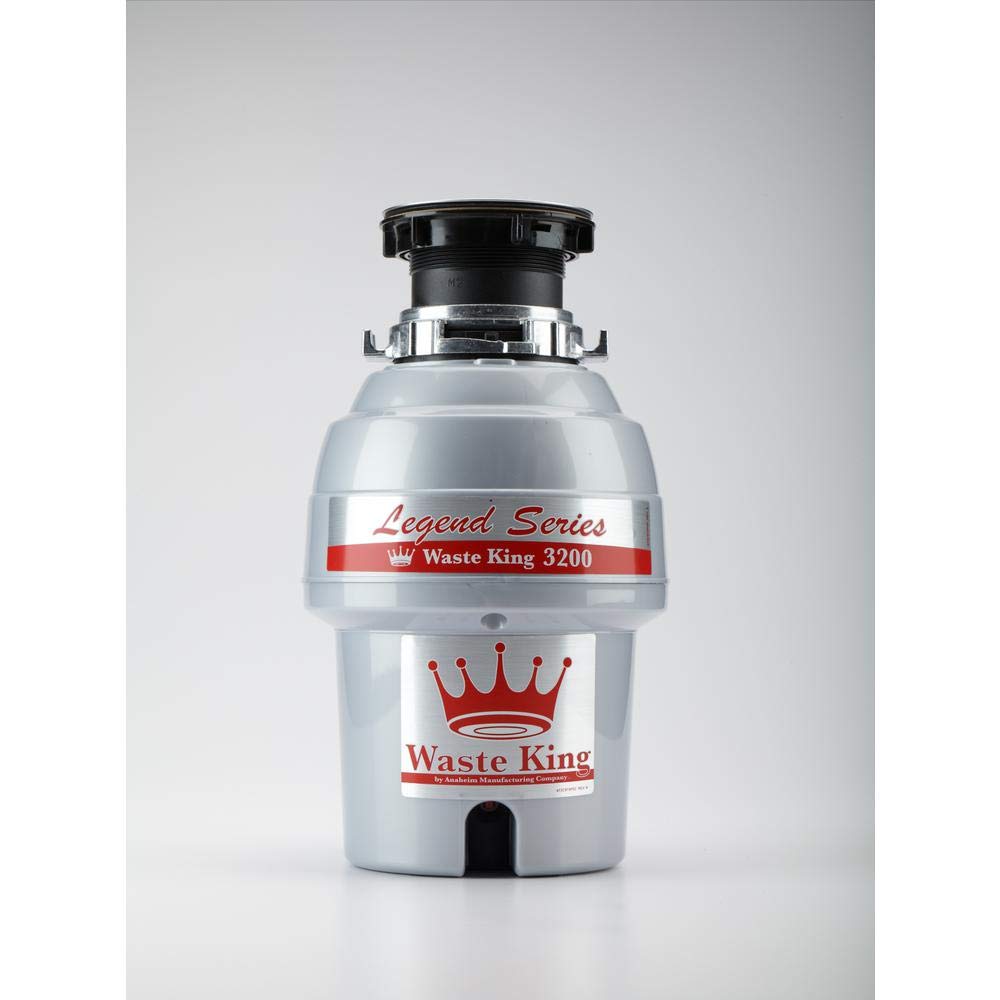
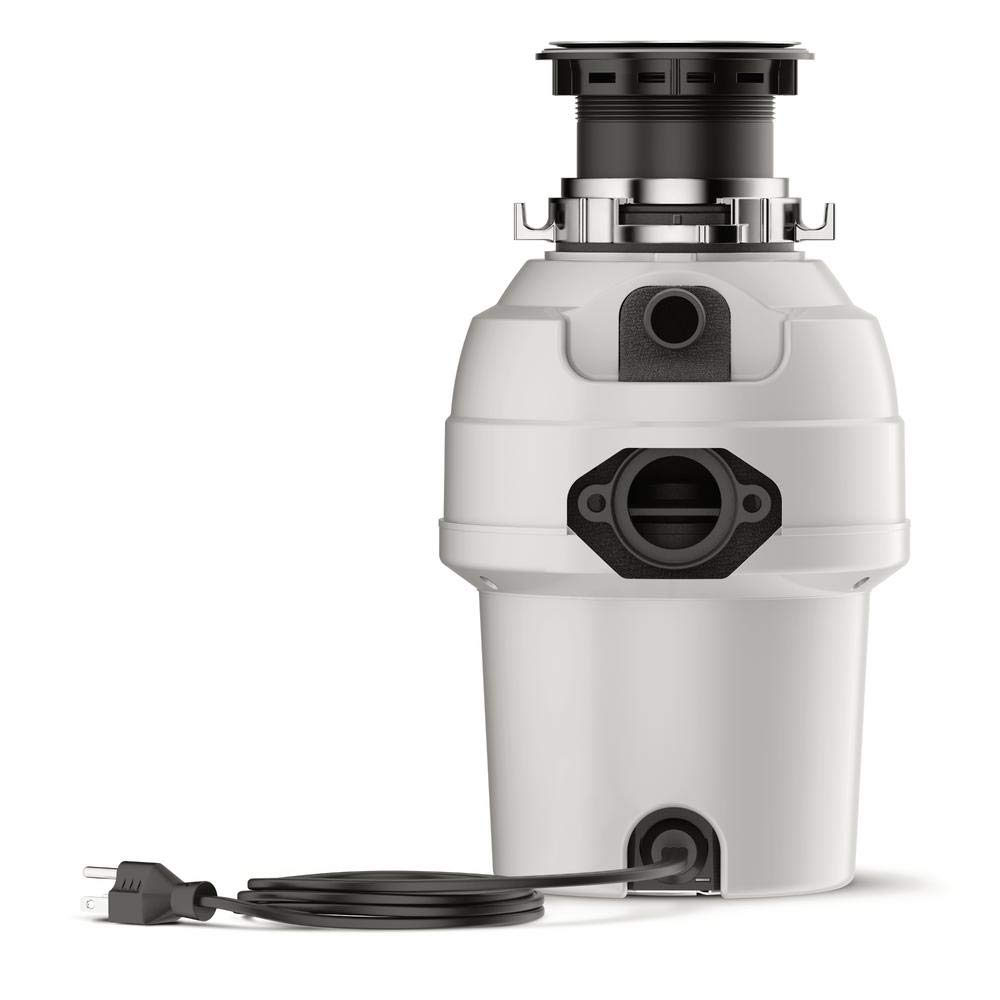
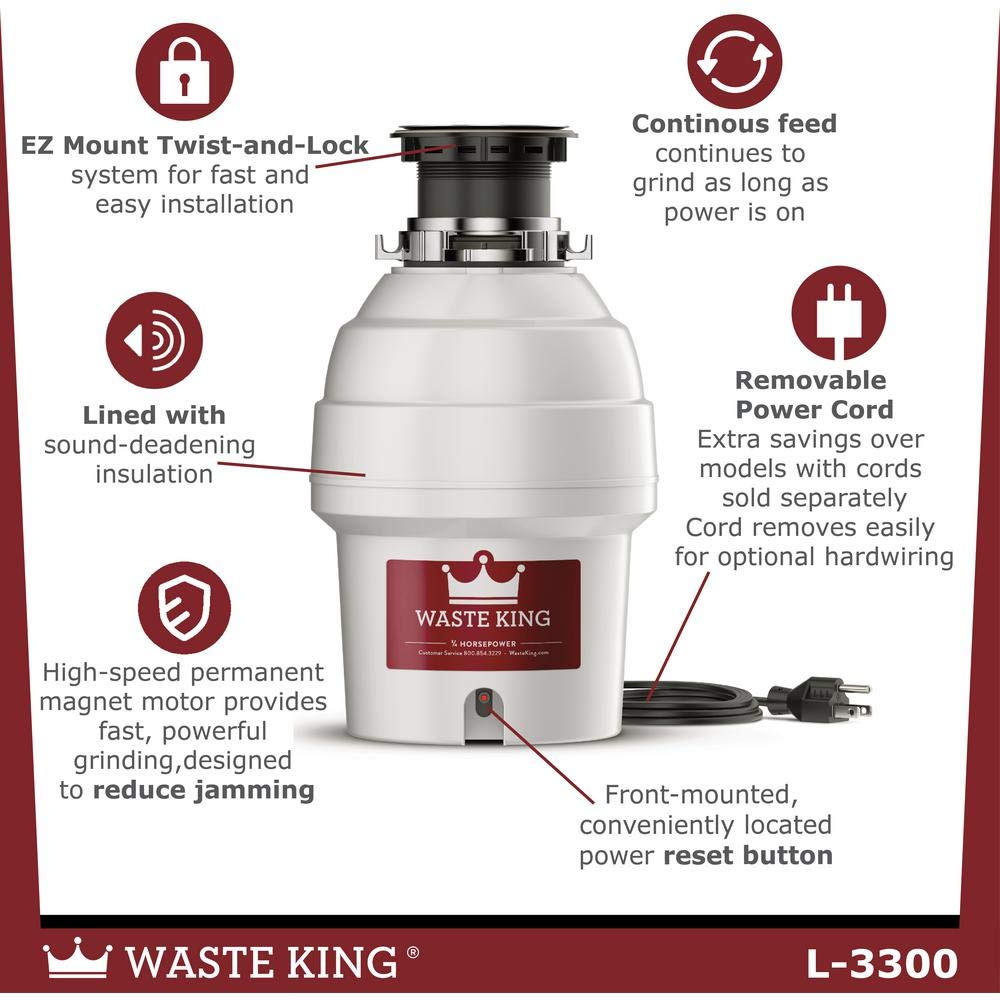
The Waste King L-3300 Garbage Disposal is a powerful and efficient 3/4 HP unit designed for easy installation and quiet operation. With a durable stainless steel construction and a 10-year warranty, it ensures long-lasting performance while effortlessly grinding food waste.
| Manufacturer | Waste King |
| Part Number | L-3300 |
| Item Weight | 10 pounds |
| Product Dimensions | 8.5 x 8.5 x 14.5 inches |
| Item model number | L-3300 |
| Is Discontinued By Manufacturer | No |
| Size | 3/4 HP |
| Finish | Stainless Steel |
| Material | Stainless Steel |
| Voltage | 115 Volts |
| Item Package Quantity | 1 |
| Included Components | Power Cord, Mounting Hardware, The Waste King Legend 2700 3/4-Horsepower Disposer |
| Batteries Included? | No |
| Batteries Required? | No |
| Warranty Description | 10 Year Warranty |
B**T
Great product - Educate yourself first
I am a researcher. I read every review - the good and the bad. I've read the Consumer Reports reviews, read the Amazon reviews, read the other, sketchier review websites like GreatGarbageDisposals.com (I made that one up but if you've done any research on the internet you get my point). I am writing this review to share what I learned about the product and about the many reviews I've read. My situation was that our 6 year old Badger froze up and simply quit on me, so a new one was in order.First, is it loud or quiet? It really depends on which review you read, apparently. I believe it depends on more than that, such as what kind of sink is it being installed under - a stainless steel or a porcelain coated cast iron sink? One is very thin and flexible and will not block out as much noise or damp vibrations as effectively as a heavy cast iron sink. I have found the overall noise level to be a lot like the Badger 5 that I replaced. My wife thinks it sounds a bit different but neither louder nor quieter. It also depends on whether this is your first disposer (it is certainly louder than not having one) or a replacement. Bottom line, it's typically run for a few seconds, with the water running too, as you are cleaning up after meal (not in the middle of the night when everyone's trying to sleep) and it's no louder or quieter than the rest. I wouldn't let that be a deciding factor unless you have different criteria. If so, you can pay twice as much for that other "Elite" one by another manufacturer that is CR-rated as the quietest one. In my case I couldn't justify the added cost.What's up with that scary loud noise when you turn it on? There are some reviews that make this sound like it is eating a spoon (a LOUD, disturbing, and/or startling snap or click noise, etc.). I have to say that was one of my biggest reservations when I ordered this thing, having read the reviews. A fairly large slice of reviewers commented negatively on it. Here's my take... The motor is 3/4 HP compared to my little dinky 1/3 HP motor on my old one. That is a lot more horsepower and, consequently, a lot more torque. The little "teeth" that do the waste grinding that sit in the base of the chamber spin freely. When you turn it on, the little grinders snap into place like how your head gets whipped back on one of those crazy spinning carnival rides. It's just from centrifugal force setting the blades into place. The fine print in the directions tell you that it is part of the anti-jam mechanism. It's not startling or even disconcerting to me or my wife. We didn't blink an eye. I couldn't scare my children by turning it on. It just makes a bit of a click when you turn it on. No biggie. Full disclosure here - ours is mounted to the bottom of a heavy, porcelain coated cast iron sink. Our sink may be better at handling the torque and may dampen the sound and vibration more than a thin stainless steel sink. Our sink weighs probably 75 pounds. A stainless steel sink weighs 7 pounds. A heavier sink can probably handle a garbage disposal operating under full load better than a flexible, lightweight sink. That's not why we got the sink but I think it's probably a benefit to damping sounds and vibrations.Some folks knocked the instructions. Take heart. It appears that the Waste King guys have heard the criticisms from the negative reviewers. I am guessing that they have been re-written to better explain the installation because they are really easy to follow. My best advice is this: don't be afraid of a difficult or confounding set of installation instructions. It is really easy. Here's what you do. Go to youtube.com and search for a video on How To Remove Your Existing Garbage Disposal because this is the hardest part. You will find one that matches yours. Watch it. I started removing the Badger incorrectly, stopped, watched a video, and then it was a piece of cake. In my case, I shouldn't have removed the three long screws before removing the body of the old one. You do it after it is disconnected. READ the instruction manual carefully. Then go ahead and youtube the Waste King installation video. It is very easy once you see it done. No filing or grinding gaskets, and Good Lord, no car jacks under your sink please. If it is hard then you are doing something wrong. STOP!!! Review the procedure. Start again. The directions are actually very explicit. The parts are well labeled. The diagrams show you what to do. The videos show you what to do. If you prepare yourself (15 minutes of reading and watching videos, tops) you will fly though the installation and be a happy person.Regarding the comments that the EZ Mount is flimsy or cheap or plastic, I have to respectfully disagree. The purpose of the lock ring is to compress the rubber gasket tight enough to make a seal so the thing doesn't leak. It doesn't need to be made from titanium or cast iron. Just because it isn't made from a rare earth metal doesn't make it inferior! It keeps the price down and works (so far) flawlessly. I did not need to tap the ears with a small hammer to get it to slide to the fully locked position - I was able to twist it into place with my bare non-Superman hands. I did not need to put dish soap on the ear slots but the directions suggest doing that if it is difficult to put into locked position.Removing ALL the old mounting hardware, cleaning everything really good, and installing the EZ Mount was truly a very easy and thoroughly explained process. No leaks at all on my first attempt!As advertised, it does come with a corded plug so it will need an outlet. My old Badger was a direct wire. Some folks tore out the cord and the strain relief as a fix and hard wired it like their old one. Some folks put an outlet in, which I found that to be a 15 minute job. I didn't want to mess around with chopping out the stock cord and putting in a new one and messing with the strain relief replacement. I thought the new outlet process was much easier because, heck, the wire's already there and that's always the hardest part of wiring a box! I shoved some of the extra length of the existing wire back into the hole in the wall that it came out from. I thought carefully about where the new box should go so the body of the disposal didn't hit it. I screwed it to the back of the cabinet, poked the wires into the box, screwed them to a new receptacle and, voila!. NOTE: IF YOU DON'T KNOW WHAT YOU'RE DOING WITH ELECTRICAL WIRING, DO NOT ATTEMPT THIS YOURSELF. If you do, be sure to kill the power at the circuit breaker and it is probably the easiest box you will install. Just make sure it is securely mounted into something besides the flimsy back panel of the cabinet.I think those are all the important items I wanted to share. The removal of the old one, cleaning the sink hole, and putting in the new box took about 35 minutes start to finish. I wasn't rushing but I was well prepared and had everything ready to go. Plumbers Putty was needed for install. Make sure you have that on hand. There was a thin rubber gasket that went under the flange (between the top flange and a stainless steel sink) that I didn't use because I didn't have a stainless steel sink. The one tricky thing I recall from the directions is that the same procedure is repeated twice in a couple of places - one for using the existing Badger mounting hardware and one for if you are using the EZ Mount system. If you are using the EZ Mount, make sure to SKIP the paragraph that is describing the work as it applies to the Badger mount. That's about it. I had to cut 3/4" off the black waste discharge pipe (90 degree elbow piece that screws into the new disposal) so that everything fit with my old plumbing. I loosened up all the slip joints on the old plumbing so I could wiggle things around as needed, aligned everything, and tightened the plumbing back up. New install was completed in well under 20 minutes after the removal and outlet installation.I hope this helps some folks who were undecided about this product. How can you ignore a 10 year warranty on something that is well below the price of competing models? No regrets here - we've had it almost a month now and use it daily. We can FINALLY grind those lemon and lime wedges!!!One last thought - Beef bones? I see that Consumer Reports tests these things by measuring the fineness of the grind using beef bones. Do people really put beef bones down a garbage disposal on purpose? You might think I'm babying mine, or maybe that's why I didn't have excessive vibration when I use it, but I'll put the beef bones in the trash and grind up the rest of the stuff with this and be just fine for many years to come, I hope!
L**F
Terrific Garbage Disposal! Easy Pleezy Installation!
The Waste King L-3300 3/4 HP is a great garbage disposal. It comes with the EZ Mount vice the 3-screw type, and is quite easy to install using this mount, well worth the effort of removing the old style rather than to try to adapt this one to it! Plus, changing it over to the EZ Mount allows you to freshen up the sink seal as well. From what I understand, however, if you have a very deep sink style, you may need to go with a special 3 screw adapter anyway, but you'll find that information out in the Owners Manual. The old one (a Kenmore 3/4 hp) took about 20 minutes to remove (including the wiring. The Kenmore was hardwired in with control via a wall switch), and it took me about 20 minutes to mount the Waste King. The adaptions I had to take care of were for the wiring and for the main drainage. The dishwasher hooked right up with no problem, using all the old connectors which fit perfectly with the new one (of course it does have a knockout plug). The electrical: This unit comes with a three prong plug already wired for you. You can still hardwire it if you need to, but I found it easier to mount a waterproof outlet box, use the electric cable to wire in a new outlet under the sink, and just plug in the disposal. If ever I want to use the plug for anything else, all I have to do is unplug the disposal, and turn on the switch, and it is now just a regular outlet. As for the drain, well... the drain line attached to the disposal is 1 1/2" standard pvc, about 9 or so inches long once it turns downward, so with that in mind, you'll have to do the configuring with what you have or what you may need to obtain from there. Because this is EXTERNAL to the drain line and the disposal itself, I don't consider this a ding on the product, as what is under the typical household kitchen sink is about as diverse and individually different as, well... Americans! I think you get the point. For me, I actually threw away two pieces from the old setup that I didn't need (A small elbow and a 9" flex gooseneck). All in all... a lot less difficult than what I had convinced myself before I started! Again, the hardest part for me was reconfiguring the drain line PAST the disposal. Now, two things: 1. A lot of people mention in their reviews the product "Waste King 3101 ISE Adapter Kit". Unless you really plan on keeping your 3 screw mount if your old one has one, do not buy this up front. I did, just in case, and I am returning it because I did not need it at all... and Amazon is charging me between $5 and $6 to return it, as it was not a mistake on them. That pretty much made my refund about 50% of the original purchase price, and I never even opened this item. So if you are not going to use your old 3 screw mount and try to adapt this to it... don't buy this item! It is probably a great item... but it's not needed! 2. In the instructions, it tells you that when you turn on the disposal, it will make a little 'click' when the non-jamming feature locks in. It does this every start. Just to let you know... it is NOT a 'click'... it is a 'CLUNK'... but after it makes that quick starting noise... it is super quiet.Things that may help in addition to what I mentioned: 1. There is no 'manual turning' wrench included like is common in other brands. 2. Does have a reset button... pretty standard. 3. Opening is a little smaller than the previous disposal. 4. Comes with a black drain plug which seals very nicely. 5. Lighter weight than the smaller disposal I pulled out. 6. When mounting, you first mount it in a 'support' position, which allows you to free up your hands to position it exactly where you want things aligned before turning the mounting collar to lock it in place... a VERY convenient mounting feature! 8. Tools I needed (not counting the tools and hardware for MY option of installing a wall receptacle - flat and phillips screwdrivers, extension light, nut driver set (or a simple cresent wrench, 6" or 8" will do), and plumbers putty. It suggested a hammer, but I didn't need one).HIGHLY RECOMMENDED, especially because you get a wonderful product AND if you so desire, get one that does NOT take a plumber to install!
I**X
No se como había vivido sin el
Lo maximo!!! Excelente calidad
TrustPilot
4天前
1 个月前