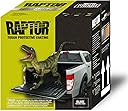


🚛 Armor your truck bed with style and strength — don’t get left behind!
U-POL Raptor Black Urethane Spray is a 4-liter truck bed liner kit featuring water and stain resistance, UV protection to prevent fading, and sound deadening properties. It offers quick drying, high adhesion, and flexibility for a durable, professional-grade finish. The kit includes a free spray gun for easy application, making it a top choice for vehicle maintenance and protection.


| ASIN | B01CKE7B1E |
| Amazon 売れ筋ランキング | DIY・工具・ガーデン - 220,845位 ( DIY・工具・ガーデンの売れ筋ランキングを見る ) スプレー塗料 - 857位 |
| Amazon.co.jp での取り扱い開始日 | 2016/6/9 |
| おすすめ度 | 4.7 5つ星のうち4.7 (5,237) var |
| ブランド | UPol |
| メーカー | U-POL |
| メーカーにより製造中止になりました | いいえ |
| 商品の寸法 奥行き × 幅 × 高さ | 25.4 x 25.4 x 25.4 cm |
| 商品の重量 | 454 g |
| 商品モデル番号 | UP0820 |
| 定員 | 4 L |
| 色 | ブラック |
| 製品サイズ | 25.4 x 25.4 x 25.4 cm; 453.59 g |
飯**光
仕上がりが、最高でした。
とても扱いやすいです、時間経過しても剥がれは無く、満足です。
レ**パ
軽トラに
軽トラの荷台を錆防止で塗りました 製品側の付属パイプに気づかずそのままハメて出ない出ないとわめき散らしたけど施行後パイプに気づきました 損したけど星5くれてやるわ
O**Y
ラプター塗料最高です
軽トレーラーを制作したので最強塗料ラプターを選びました!失敗しても、上塗りオッケー!素人でも安心して作業できました!
A**ー
ベットライナーに限らず、おすすめできます。
シボレー C10。荷台チャネリングしてフロアを高くした分、サイドの高さはノーマルより低いですが、1本で全面塗れます。60分以内にセカンドコートをと書いてたので、もう1本使って、2本で完了。4本セットでしたが、2本は他車用に保管しておきます。 硬化剤は1本(で4本分)付属してますが、ボトル1本分の必要量を計れる計量カップも付属しているので悩む必要なし。 スプレーガンは洗浄シンナーで綺麗になります。何回でも使えそうです。 仕上がりはベットライナーを入れたかと思うような雰囲気になります。塗り始めは国産のチッピングスプレーとあまり変わらない感じです。。塗り重ねる事で雰囲気が変わります。 外装パーツ色々に応用できそうです!
M**M
Has lasted for years. Protects well from scratches.
I didn’t apply it myself, but I took it to a shop and they applied it with no issues. I’ve had it in the bed of my truck for about 3 years now, and it’s held up well, but there are spots that are starting to peel. I live in Okinawa though, where the sun is very strong, especially in the summertime. And I don’t have covered parking, so my truck is always getting hit by the sun, so that could be why it’s starting to peel so soon. Maybe if you have covered parking, or a tonneau cover, this will last much longer than it has for me. I think the price is fair. It’s cheaper in the states, but it’s difficult/impossible to ship here, so this is your best option. I also still have a bottle and a half left over, so maybe I can have someone touch up the spots that are starting to peel.
し**ん
塗るのが大変
電動スプレーでなんとか塗れましたが,スプレー本体が目詰まりして洗浄苦労しました
内**一
塗装が簡単❗
説明書は英文で私には理解不能でしたが図解で何とか解りました。 初め戸惑いましたが、塗料の飛び散りも少なく直ぐに慣れると思います。 近付けるとベターな感じで 30㎝位離して吹くとボツボツ感が出ます。
K**M
簡単にできる。
コンプレッサーと多少の塗装経験があれば簡単にできると思います。仕上がりにも大変満足しています。
R**Y
Works well
Good product
R**.
Calidad de los productos
Producto llego muy golpeado
R**T
Awesome Reseults!
Let me start by stating that I bought and applied the Raptor Spray-On Bedliner approximately 3 months before this review was written and I am 100% completely satisfied and happy with the results. A little more background info...I have painted 3 or 4 other bedliners in the past using different brands, including Rustoleum and Rhino. Raptor is by far the best so far. I am also nothing more than a guy who likes to do things for himself. I'm not a mechanic or professional "car guy" in any way. In fact, aside from changing out my own head light bulbs, I won't touch anything else on my truck. I'm also not a contractor- my truck gets used for hauling things frequently, but not on a daily basis, so I probably but it through a moderate amount of abuse, but not intense, daily abuse. Ok, to start, I chose this Raptor kit after reading many reviews and watching several online "how-to" videos. In the past I used brushes and rollers to do the job, but I was never fully satisfied with the results- look and durability. I wanted to try the spray-on method to see of it would turn out better. I'm glad I did! Also, I applied this liner to a 2013 Chevy Silverado short bed that was new to me and in great condition, not a beater truck by any means. VERY IMPORTANT- prep is the most important part of the job so DO NOT get lazy and cut corners!!! I started the job in the morning by removing the already installed drop-in plastic liner and sanding down the bed and bed walls. I did not apply to the tailgate as it had the plastic portion installed already and removing it to spray in the Raptor meant having to mess with the wiring for the backup camera and I wasn't interested in doing that. I used a Ryobi cordless sander and a Black and Decker corded electric hand-sander to remove the paint. I probably went a little too far down in some areas and exposed the bare metal, but not a problem because I also sprayed in a couple coats of U-Pol Acid Etch Primer #8. But before that, I washed out the bed with TSP and water followed by a wipe down with Acetone and then taped off all parts I did not want getting painted. Blue painter's tape worked just fine. I also wrapped most of the rest of the truck with plastic painter's tarps so that no mist or paint got on any part of the truck I did not want it on. Once the bed was sanded down, cleaned, taped off and primed, it was on to the bedliner. I chose the Raptor brand because of the spray-in feature, but I did not have an air compressor. I had planned on renting one for a few bucks, but my neighbor had one I borrowed. Nothing heavy duty, but enough to reach the recommended PSI (60??? double check the directions). I also had to buy an adapter (3 or 4 bucks from Advance Auto) because the supplied gun was not compatible with the compressor hose. Not a big deal and easily addressed. Spraying in the liner was easy, but it took me a little bit to get the hang of it. Definitely watch a few videos online to see how others did it. My kit came with 4 bottles of liner and 1 bottle of activator. Make sure you wear gloves- I did not and I paid for it with black hands for a week or so. Follow the directions that come with the kit for mixing and then paint. Its a simple process...make slow, smooth passes with a slight overlap. The first coat should be light and you can go heavier as you do more coats. I think this kit gave me 3 or 4 coats. When I painted in the liner, I actually ran out of daylight as I finished the 3rd bottle. As a result of rushing and trying to finish the job before the sun went down, that last coat was not sprayed evenly and when it dried, there were light and dark splotches that looked like I used 2 different shades of black. Not a problem. The next day I sprayed on a final top coat with the 4th bottle. I took my time, moved slowly and smoothly and in the end everything looked great. I did not use haul anything in the bed for about 2 weeks after spraying in the Raptor liner. I don't remember what the directions recommended, but whatever time frame was, I gave it a couple more days to be extra careful. In the end, I am extremely happy with the results and definitely recommend this product to anyone thinking of doing their own bedliner. It was very easy and in the end mine came out looking almost professional grade., All told, including buying the primer, tape, adapter, tarps, etc. I paid less than $200 for a bedliner that would have cost me hundreds more to be professionally sprayed in. It took me just over a day to do and 3 months later, it looks as good at it did the minute I finished and I haven't noticed any wear whatsoever. I hope this review helps and good luck!
C**S
Good stuff-Tips in review
What: Raptor lined my utility trailer Product used: Black and Tintable Raptor liner Product used where: My garage Tips, make sure you tape off everything you don’t want to get spray on. Originally thought I could use a box( As a shield) to hold up to areas where I didn’t want liner, but you just need to tape and paper everything off. The gun it comes with works easy, but can spray a little chunky if you don’t have the PSI on your tank turned up to 60 PSI. The spray gun doesn’t come with a quick connect to attach to your air compressor hose, so I bought one and attached it to the gun that came with the liner. This way I could easily disconnect/connect the gun while switching from bottle to bottle of liner and then easily connecting to my hose. I saw some guys online do it at 40 PSI, but it definitely sprayed better at 60 PSI. I used my little Dewalt pancake air compressor, which I believe is a 6HP or so. They recommend a bigger air compressor, but it worked fine. I Raptor lined my trailer Black & Green. I thinned out the tintable liner with a Urethane based (Reducer/thinner) and it definitely made it easier to spray and gave it a less chunky look. For some reason it’s called a reducer, which has the same effect as a paint thinner but due to the material type it takes a “reducer” The Black Raptor liner I did not have to reduce. It’s easier to work with than the tintable. I think this is due to the tintable having the paint in it as well as a thicker starting consistency. If you use tintable, here is the breakdown per bottle. One Bottle of Tintable Raptor Liner 3 ounces of Paint (I used a custom green color) 5 ounces of urethane reducer ( Reducer is like a paint thinner) I got this from Autozone. 8 oz of Hardner (comes with liner) I emptied the bottle into a 2 Quart Mixing cup and then added the 3 ounces of paint and mixed with a paint stir stick. After mixing the two I then added in the Urethane Reducer. At first it sits at the top, but after you stir the mix itgets to a thicker paint like consistency. Last you mix in the 8 oz of hardner. After mixing for a minute or so use a funnel to get the material back into the bottle. You need the material in the original container because the spray gun attaches to the bottle. Set air compressor to 60 PSI and spray. Wear a mask, gloves, painting suite & goggles. Lay down plastic drop clothes if you’re doing a trailer or something that’s not a truck bed. Material will get in the air and you’ll have liner on stuff. Make sure you wear a mask and safety items that I mentioned. Material gets in the air and you don’t want to breathe it in.
C**P
Good product
Good product. Very scratch resistant
Trustpilot
3 weeks ago
1 month ago