

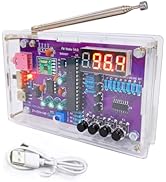
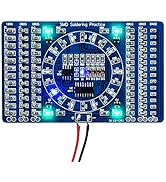
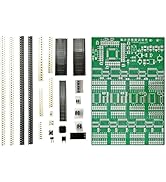
LED Chaser Kit Soldering Practice Kit PCB Board for School Learning Pr...
Product ID: 477705390
Details
- BrandGikfun
- CPU ModelARMv7
- Connectivity TechnologyUSB
- Included ComponentsVHS
- Model NameEK1974
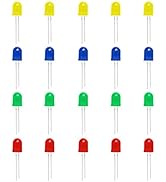
💡81 vibrant LEDs
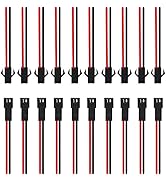
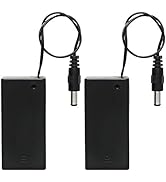
🔌USB or battery powered
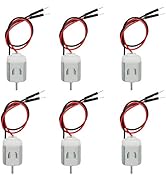
⚙️2 adjustable potentiometers
S$29
1
Sold byAmazon SINGAPOREDelivered byDesertcartCustomer service byDesertcartReturns14 days · 30 with PRO
Buyer Protection · Full refund if your order doesn't arrive as described.
Desertcart purchases this item on your behalf and handles shipping, customs, and support to SINGAPORE.
Secure transaction
Details
- BrandGikfun
- CPU ModelARMv7
- Connectivity TechnologyUSB
Description
⚡ Light up your skills and your space with 81 LEDs of pure DIY brilliance!
- STEP BY STEP SUCCESS - Comes with a detailed user manual and online PDF guide to ensure flawless assembly.
- PLUG PLAY VERSATILITY - Powered by USB or battery, so you can build and showcase your creation anywhere.
- MASTER THE ART OF SOLDERING - High-quality PCB with clearly marked components makes even beginners solder like pros.
- STEM LEARNING MEETS HANDS ON FUN - Perfect for school projects and adult hobbyists eager to sharpen electronics skills.
- DYNAMIC LED GRAPHS AT YOUR FINGERTIPS - Adjust speed and pattern with two potentiometers for mesmerizing visual effects.
The Gikfun LED Chaser Soldering Practice Kit features 81 LEDs on a high-quality copper PCB designed for STEM learning and soldering practice. With two potentiometers to control dynamic LED patterns and flexible USB or battery power options, it’s an ideal hands-on project for adults and advanced students. Complete with clear component markings and comprehensive guides, this kit transforms electronics education into an engaging, decorative experience.


Specifications
| ASIN | B0BFHGK7JQ |
| Age Range Description | Adult |
| Best Sellers Rank | #32,697 in Industrial & Scientific ( See Top 100 in Industrial & Scientific ) #66 in Soldering Stations |
| Brand Name | Gikfun |
| Customer Reviews | 4.5 4.5 out of 5 stars (222) |
| Educational Objective | Construction Skills, STEM |
| Included Components | VHS |
| Is Assembly Required | Yes |
| Manufacturer | Gikfun |
| Manufacturer Minimum Age (MONTHS) | 192 |
| Manufacturer Warranty Description | 1 year |
| Material Type | copper |
| Set Name | LED Chaser Soldering Practice Kit (81 LEDs) |
Common Questions
Yes, all products are sourced directly from authorized retailers in the US, UK, UAE and India. We maintain strict quality control processes and verify each product before shipping. All items come with applicable manufacturer warranties and are covered by our standard return policy.
Delivery times vary by destination country, typically ranging from 3-9 business days. Each order is fully trackable through our system. We handle all customs clearance and use reliable courier partners for last-mile delivery. You'll receive regular updates about your order status via email and our app.
Desertcart is an international e-commerce platform operating since 2014. We securely process thousands of orders globally each day. Every product goes through our quality verification process before delivery, and we provide end-to-end order tracking, 24/7 customer support, and a comprehensive returns policy to ensure a safe shopping experience.
Our prices include the product cost, international shipping, import duties, customs clearance, and local delivery charges. We handle all customs and import procedures, ensuring there are no hidden fees upon delivery. PRO members receive additional benefits including free shipping.
Trustpilot
TrustScore 4.5 | 7,300+ reviews
Shop Global, Save with Desertcart
Value for Money
Competitive prices on a vast range of products
Shop Globally
Serving millions of shoppers across more than 100 countries
Enhanced Protection
Trusted payment options loved by worldwide shoppers
Customer Assurance
Trusted payment options loved by worldwide shoppers.
Desertcart App
Shop on the go, anytime, anywhere.