Desertcart purchases this item on your behalf and handles shipping, customs, and support to SINGAPORE.
🚀 Elevate your vision with ultra-efficient, plug-and-play clarity!
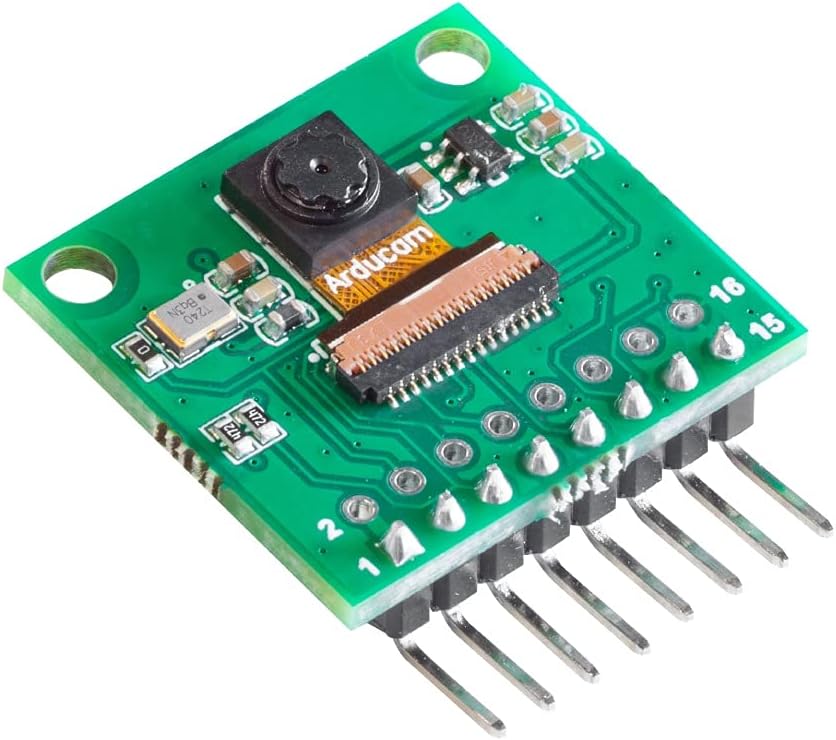
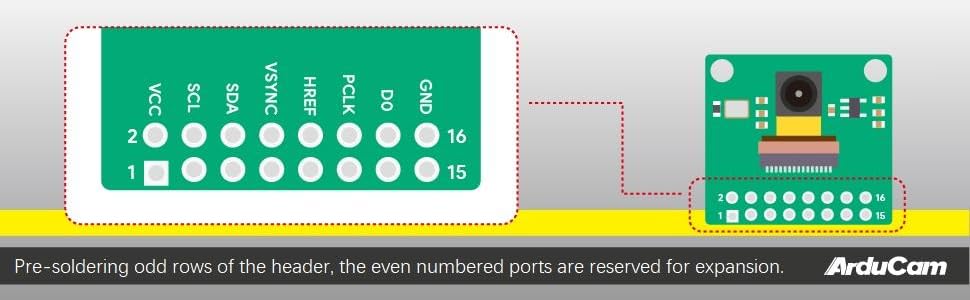
The Arducam HM01B0 Monochrome QVGA Camera Module is a compact, ultra-low-power camera designed for Raspberry Pi Pico and RP2040 boards. Offering 320x320 resolution at up to 60FPS, it excels in machine vision and always-on applications with minimal energy consumption under 2mW. Its plug-and-play design with pre-soldered headers and included jump wires ensures quick integration, while advanced features like motion detection wakeup and synchronized video output make it a top choice for professional embedded vision projects.


| ASIN | B093KBQB1C |
| Best Sellers Rank | #1,414 in Single Board Computers (Computers & Accessories) |
| Brand | Arducam |
| Color | HM01B0 QVGA Camera Module |
| Compatible Devices | Raspberry Pi Pico, Third-party RP2040 boards |
| Connectivity Technology | 1-bit video data serial interface, 2-wire I2C serial interface |
| Continuous Shooting Speed | 60 frames_per_second |
| Continuous shooting speed | 60 frames_per_second |
| Customer Reviews | 4.0 out of 5 stars 19 Reviews |
| Effective Still Resolution | 0.1 mp |
| Manufacturer | Arducam |
| Mfr Part Number | B0315 |
| Model Name | HM01B0 |
| Model Number | B0315 |
| Number of Items | 1 |
| Photo Sensor Resolution | 0.1 mp |
| Video Capture Resolution | QVGA |
M**S
Camera works. Software is not great
The camera works as advertised. The software support is not great. Get ready to do some code patching.
K**X
Can use because got junk kit sold here
Bought a Pico kit was smoking in front of my students which was embarrassing. I am an electronic and robotics engineer instructor. And was embarrassed to get a bad kit thnow can't even ruprobably junk too. I didn't want to be embarrassed like that. Because of this my school isn't reimbursing me and being tossed around more time than a volleyball. With no help in a refund. BUY AT OWN RISK!!!! IF YOU WANT TO WASTE MONEY!!!
ま**長
1日掛けて無事にRaspberry Pi4で動きました
Linux初心者でしたが、はんだごても不要で何とかなりました。 メス=メスのケーブルは付属していたので購入する必要はありませんでした。 (直接ブレッドボードに挿しても良いですけど) 配線図はArducamのホームページに行けば分かりますが、GPIOの意味とかは事前に勉強した方が。 動作はThonnyのMicro Pythonではなく、Ardiuno IDEのCircuit Pythonです。これも事前に要勉強。 PicoはWHでも動きました。 小型で良いのでブレッドボードと色違いジャンパー線が8本あると楽です。 マイクロUSB(B)はデータ転送用を確認して別途用意。 開発環境はArdiuno IDEとProcessingですが、プログラムはコピペで動きます。 ttyの確認をするのに「ls /dev/tty*」くらいは自分で打てた方が。 Ardiuno IDEの癖に慣れるのに一番時間を費やしました。
Trustpilot
2 weeks ago
2 weeks ago