Desertcart purchases this item on your behalf and handles shipping, customs, and support to SINGAPORE.
🔧 Upgrade your faucet game with Moen’s Magnum precision!
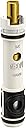
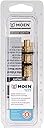
The Moen 1225 Magnum Cartridge Replacement Kit is a genuine, durable brass and plastic cartridge designed to restore optimal water flow and temperature control in most Moen single-handle kitchen and bathroom faucets. Made in the USA, it includes a DIY installation tool and instructions, offering a cost-effective, reliable fix for leaks and stiffness in older faucets, ensuring long-lasting performance and compatibility with models dating back to before 1990.


| ASIN | B0006290R6 |
| Additional Features | Durable, Easy to Install |
| Best Sellers Rank | #10,202 in Tools & Home Improvement ( See Top 100 in Tools & Home Improvement ) #9 in Faucet Cartridges |
| Brand | Moen |
| Brand Name | Moen |
| Color | N/A or Unfinished |
| Customer Reviews | 4.6 out of 5 stars 5,564 Reviews |
| Finish Type | Unfinished |
| Finish Types | Unfinished |
| Handle Lever Placement | Sink |
| Handle Material | Brass |
| Handle Type | Lever |
| Included Components | Replacement Parts or Service Kit |
| Installation Method | Single Hole |
| Item Type Name | One Handle Kitchen and Bathroom Faucet Cartridge Replacement Kit |
| Item Weight | 1.6 ounces |
| Manufacturer | Moen Incorporated |
| Manufacturer Part Number | 1225 |
| Manufacturer Warranty Description | 1 Year Limited |
| Material | Brass , Plastic |
| Material Type | Brass, Plastic |
| Model Name | Moen Collection |
| Model Number | 1225 |
| Number Of Handles | 1 |
| Number of Handles | 1 |
| Number of Items | 1 |
| Number of Packs | 1 |
| Number of Pieces | 1 |
| Recommended Uses For Product | Bathroom |
| Room Type | Bathroom, Kitchen |
| Style Name | Replacement Part |
| UPC | 026508012253 |
| Unit Count | 1 Count |
| Warranty Type | limited |
T**G
Excellent replacement, BUT...be aware...
My shower cartridge was from 1977!! Original to the house being built. I am the second owner. The cartridge became very difficult to pull in and out, and turning was okay but required a good grip. It got to the point though, that pushing it in to turn it off didn't turn it all the way off. Unless you put some body weight into pushing it in. Being that I had no idea what cartridge I needed, I wrote to Moen and ask them. This was the cartridge they recommended for my situation. I'm a 63 year old lady , and I've never replaced a cartridge before, so I read a lot of reviews and watched YouTube videos. I bought a cartridge puller tool, which I'm glad I did!! Excellent advice from those that advised it. Following the directions of YouTube videos, I was able to remove and install the new cartridge very easily. I was concerned that it wasn't going to work because the cartridge I purchased was completely different than the cartridge I pulled out!! Not even similar! So when I got everything put back together and turned the water back on, I had a little bit of trepidation that water was going to come blasting out because it was the wrong cartridge. LOl!! I even pulled the shower curtain closed, just in case!! However that didn't happen, and the cartridge worked flawlessly. As a matter of fact it works so smoothly that it's almost completely effortless. Such a wonderful change!! I will add, that I did lubricate the cartridge (per video advice) with silicone meant for swimming pool equipment and gaskets. And I'm sure that that helped make it operate more smoothly. Now you may be wondering why I said "But" in the title. Well, the cartridge I received is not the cartridge pictured for this item. The only picture that looks like the one I received is if you scroll down through all of the information and you see the Moen box with the cartridge in it, and the cartridge is actually transparent. That's the one I received! I did not see Moen stamped on it, and I actually looked! So that's why I said "But". I did not receive the cartridge that is shown in the picture at the top of this item. I really think that the picture should be changed to accurately represent what the buyers are going to receive.
P**C
easy to install
works as expected. Willl get more years out of the hardwr==5
B**F
Works great, but can be a tricky DIY job
There are a few tricks to a DIY job of replacing the old Moen shower valve cartridge from the shower water supply pipe. 1) Once you've removed the plastic handle and shower valve cover you should thoroughly soak the area between the old Moen shower valve cartridge and the shower water supply pipe with a CLR (Calcium, Lime, and Rust remover) solution. In fact you should keep spraying this area with the CLR solution, and even let it sit soaking overnight. The reason is that the old shower valve cartridge has a tendency to stick to the shower water supply pipe thereby making it very difficult to remove. Soaking with the CLR solution should help to un-stick the valve cartridge thereby making it easier to take out. 2) You are now ready to remove the old Moen shower valve cartridge. 3) Pull up and out the retainer U-clip on top of the old shower valve cartridge. Important: you cannot remove the old shower valve cartridge until you've removed the retainer U-clip. Make sure to save the retainer U-clip and do not lose it, you will need to put it back in when the new shower valve cartridge is in place. 4) Insert the white plastic tool, which is included in the replacement valve kit onto the cartridge stem so that it straddles the ears in the old shower valve cartridge. Use pliers on the white plastic tool and loosen the cartridge by twisting it clockwise, and counter-clockwise. If need be, spray more CLR solution in between the shower supply pipe and the old shower valve cartridge. 5) If using the white plastic tool you are able to cause the old shower valve cartridge to freely rotate within the shower supply pipe (i.e you have un-sticked it from the pipe). Use the pliers to grasp the cartridge stem and pull it straight out of the shower supply pipe. 5a) If the entire old shower valve cartridge comes out then proceed to install the new shower valve cartridge at step 8. 5b) If only the center valve comes out and the cartridge casing remains within the shower water supply pipe. Then you will need to either purchase (Amazon link below) or rent the "Danco Moen Cartridge Puller" tool. Your local hardware store (like Denault's Hardware) will also rent these out for a nominal fee, my local hardware store rents it for $3 for a 3 hour period. Then proceed to step 7. Moen Cartridge Puller http://www.amazon.com/Danco-Moen-Cartridge-Puller/dp/B000DZKXDQ/ref=sr_1_2?ie=UTF8&qid=1351998625&sr=8-2&keywords=moen+cartridge+puller 5c) If you are unable to get the old shower valve cartridge to freely rotate within the shower supply pipe, or you destroy the white pastic tool because the old shower valve cartridge is really stuck then you will need to either purchase or rent the "Danco Moen Cartridge Puller" tool described in step 5b above. Then proceed to step 6. 6) Using the Danco "Moen Cartridge Puller" tool, insert the end of the tool onto the cartridge stem so that it straddles the ears in the old shower valve cartridge. Grab the handle of the tool and loosen the cartridge by twisting it clockwise, and counter-clockwise. If need be, spray more CLR solution in between the shower supply pipe and the old shower valve cartridge. Once the old shower valve cartridge freely rotates within the shower water supply pipe, use pliers to grasp the cartridge stem and pull it straight out of the shower supply pipe. 6a) If the entire old shower valve cartridge comes out then proceed to install the new shower valve cartridge at step 8. 6b) If only the center valve comes out and the cartridge casing remains within the shower water supply pipe then go to step 7. 7) If you get here, then you have pulled out the center valve from the old shower valve cartridge, but the old cartidge casing is still inside the shower water supply pipe. Now you will need to use the Danco "Moen Cartridge Puller" tool to remove the old cartidge casing still inside the shower water supply pipe. This is done by moving the brass slip on the tool to push the springed pin at the end of the long skinny tube of the tool down. Next insert the tool's long skinny tube into the the old cartidge casing inside the shower water supply pipe until the brass slip is pushed off the springed pin and it pops up and engages a hole at the end of the old stuck cartridge casing. You may need to play with this for a little while by rotating and pushing the tool until its springed pin engages and catches the hole built into the old stuck cartridge casing. Once the tool's springed pin has been engaged, then you need to yank and pull out the old cartidge casing. It may take a bit of pulling, and as before it's a good idea to keep spraying the area with the CLR solution. 7a) In the unlikely event that you still cannot get the old cartidge casing out with the Danco tool. Then your options are to either call a plumber, or try to remove the old cartidge casing by threading it and inserting a bolt into it which you would then yank out. The following YouTube video shows how to do this, but this is to be used only as a last resort. [...] 7b) If the old cartridge casing is successfully pulled out, then proceed to install the new shower valve cartridge at step 8. 8) INSTALLING THE NEW VALVE CARTRIDGE: If your new valve cartridge does not come with the outer casing pre-greased, then you should apply plumber's grease to it in order to ensure that it will be easier to remove in the future. 9) Push the new valve cartridge straight into the shower supply pipe, making sure that the ears of the cartridge are lined up precisely with the retainer U-clip notch. 10) Re-install the retainer U-clip on top of the new shower valve cartridge by inserting it down into the notch. 11) Re-assemble the shower shower valve cover (add caulk around it) and the plastic handle.
S**C
Quality Cartridge
Affordable Moen replacement cartridge. Exact replacement I needed. Hired a plumber to swap it out because I've read stories about pipes bending behind the wall and making it worse.
J**T
Suprise, it was easy
My Moen single handled shower valves are 40 years old. This is not the first time I have replace one or more of them. In addition to age, the water we are supplied with has a high calcium content, hence lots of scaling and hard water deposits. This is the first time I have made the replacement with the 1225 model of the cartridge required. In the past I have used the 1200 model which is almost entirely brass. The 1225 has some brass components and some plastic parts as well. I am skeptical that it will last as long but it is a Moen certified replacement part. I was pleased with how easily it fit back into the valve after removing the old one and doing a little clean up. Mine came already lubricated which was appreciated. No leaks on the first try, I am satisfied. The only complaint is the instructions are very fine print and brief.
F**A
OEM part
Works well. OEM. Looks just like the one I replaced.
D**N
Great Design: This Is Correct for all 1225 Faucets
If your valve uses a 1225, this is the real deal. The design is so good that replacement is a 10 minute job -- three minutes without all the peripheral stuff like shutting off and draining the water from your system. Use the included tool for both removal and installation (bit of twisting to remove or seat); use plumbers grease; turn on your water when the old one is out (carefully -- get someone else to help to turn it on and off and something to "catch" or redirect the water) to rinse out the valve receiver side; if you look at it you can tell which way it needs to face for hot and cold to be on the correct sides but if you get it wrong, just take it out, rotate it 180 degrees and put it back in and it'll be right. Easy peasy. Never been a fan of Moen faucets and now I absolutely am.
G**N
OEM Moen
OEM Quality. Works great for 2 or 3 years (Hard Water issues here), easy to replace, fixes leak. For those that hesitated here due to the picture not looking like the OEM clear cartridge, the picture is incorrect.
C**L
Bon produit
Rien à signaler
R**S
Good part, good price.
Not much to say here. This is a quality OEM part. The instructions were pretty clear, and the entire job took me about 20 minutes. Even if you aren’t particularly handy, this is an easy job to take on. Perhaps take note of the order that you remove parts to get to the cartridge to make putting things back together easier. No more leak, and the replacement part operates much more smoothly than the old one. The Amazon price I paid for this had all the others beat by a wide margin as well. Shipping was a bit slower than I’m used to, but I’m spoiled by getting most items I order within a day or two even without getting same day shipping. This took four days to come, which might be an issue if you only have the one sink.
C**N
ottimo
ricambio come richiesto arrivato in fretta
C**A
Otimo produto
E**.
Cumplió a la perfeccion
A pesar de que el maneral Moem es de hace más de 25 años el cartucho trabajo a la perfección.
Trustpilot
2 days ago
2 months ago