Desertcart purchases this item on your behalf and handles shipping, customs, and support to SINGAPORE.
๐ง Upgrade your plumbing game with Oateyโs saddle tee โ where precision meets durability!
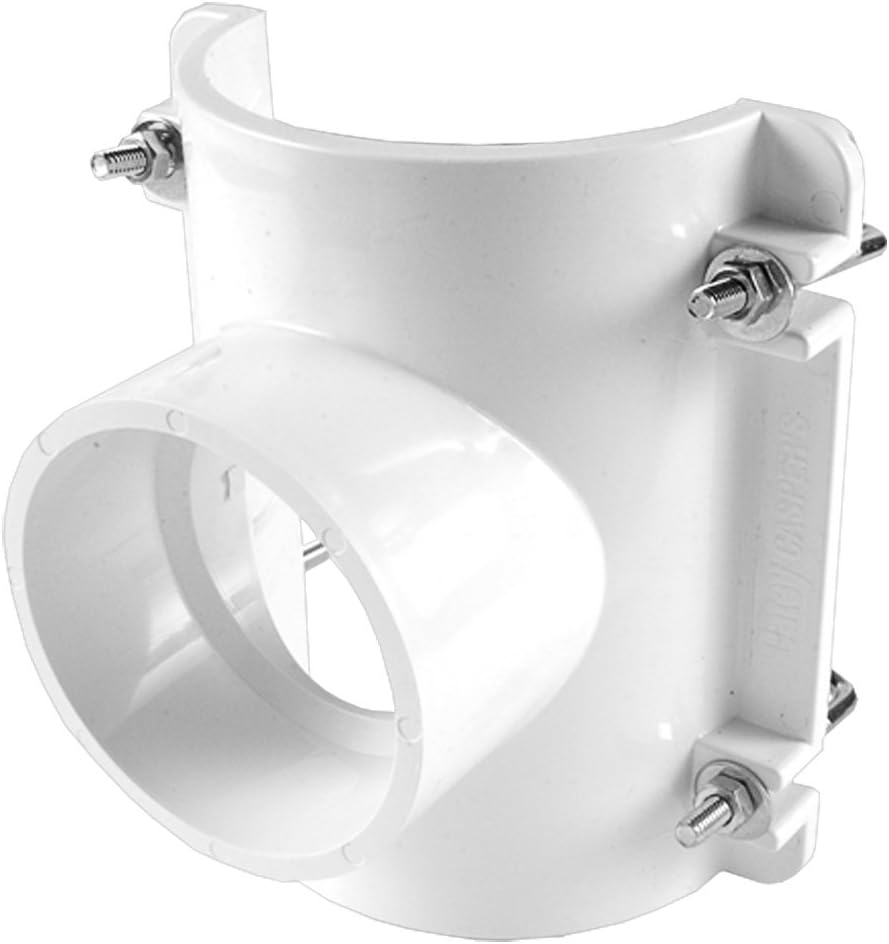
The Oatey 4 in. x 3 in. PVC Saddle Tee Kit is a professional-grade plumbing solution designed to tap into 3" or 4" Schedule 40 DWV lines. Featuring durable PVC construction and a complete hardware kit with V-bolts, washers, and nuts, it withstands working pressures up to 10 PSI. Trusted by plumbing pros for over 100 years, this kit ensures secure, leak-resistant connections for both residential and commercial applications.
| ASIN | B000BQPKG2 |
| Best Sellers Rank | #106,561 in Industrial & Scientific ( See Top 100 in Industrial & Scientific ) #3,235 in Pipe Fittings |
| Brand | Oatey |
| Brand Name | Oatey |
| Color | White |
| Connector Type | Tee |
| Customer Reviews | 4.5 out of 5 stars 182 Reviews |
| Exterior Finish | PVC |
| Global Trade Identification Number | 00038753437934 |
| Included Components | OATEY - 43793 |
| Item Dimensions | 7 x 6.5 x 4.5 inches |
| Item Type Name | OATEY - 43793 |
| Item Weight | 16 ounces |
| Item dimensions L x W x H | 7 x 6.5 x 4.5 inches |
| Manufacturer | Oatey |
| Manufacturer Part Number | OATEY - 43793 |
| Manufacturer Warranty Description | 1-year limited |
| Material | Polyvinyl Chloride |
| Material Type | Polyvinyl Chloride |
| Model Number | OATEY - 43793 |
| Number of Packs | 1 |
| Number of Pieces | 1 |
| Set Name | Oatey 4 in. x 3 in. PVC Saddle Tee Kit |
| Size | 4 In. X 3 In. |
| Thread Size | 4 inch |
| Thread Type | NPT |
| UPC | 038753437934 |
| Unit Count | 1 Count |
M**2
Good device if you need one.
Simple saddle connection. Ideal if you're tapping into an exiaring straight sewer line. Worked as described. No complaints!
J**N
works great
good quality and easy to add to existing plumbing
N**N
Installation Clarification! May require modifications...
I've installed 3 of these on a buried 3" & 4" pipe that directs water from downspouts, patio drains, and retaining wall stains, out to the curb. Installation is straight forward enough, but the 4" and 3" pipes I was connecting to are all Schedule 30 DWV variety, the slightly smaller diameter / thinner cross section. This saddle is intended for Schedule 40 diameter pipe. Simple enough, I ordered a 3" PVC DWV adapter bushing from Supply House, and that easily allowed the transition from the smaller DWV to the larger 3" Sch 40 socket on this saddle. It also appears a 3" DWV coupler is the proper outer diameter to fit the saddle's socket, but haven't actually installed it that way. For the saddle connection to the slightly undersized 4" PVC, I cut an extra length of Sch 30 DWV pipe -- about the same length as the saddle -- split it open, and "wrapped it" around the existing buried pipe, securing it with PVC cement. This increased the diameter to that of Sch 40 PVC and the saddle fit perfectly. I drilled the opening through both pieces using a hole saw, only after they were glued together. One part of the instructions that's unclear is that, after gluing the saddle onto the main pipe (step 3), we're advised to "not disturb" for 2 hours, nor "apply pressure" for 8 hours. Step 4 instructs to install the included clamping bolts. I called Oatey to clarify whether I should wait 8 hours before "applying pressure" (installing and tightening the clamps) and told I should do that immediately after gluing (within 15 minutes, I was advised). PVC becomes soft when PVC cement is applied, so I wanted to make sure they didn't intend this to prevent tightening the saddle down so much that it deformed the main pipe. Rather than PVC primer, I chose PVC cleaner on this job, since the buried pipe was fairly dirty. I also used a pair of cheap 1" paint brushes for application of the cleaner and cement, to ensure good coverage.
D**O
Made for schedule 40. Very sturdy. Easy to install.
This product is made for schedule 40 so I ripped another piece of NDS and placed it over my buried NDS pipe glued it with purple primer and blue glue then placed this saddle over the top and glued it down as well. The bracket is easy to install as well. Works perfectly exactly what I needed for my project, highly recommend!!
K**N
As described
As described
B**K
Clothes washer connection needs added to the existing 4-inch PVC drainpipe
Bought for working on a rent house that needs a clothes washer connection added to the existing 4-inch PVC drainpipe. Appears to be well made but hasn't been installed yet. Good value for your money, and was not available at the local brick and mortar stores.
D**C
This needs an alternate design for many applications
This fitting is used as a retrofit - and in many if not most situations, not all of the back side of the pipe is available for use of the U-bolts. In my case I solved it by cutting off both sides to eliminate the U-bolt flanges. Then I bought two high quality S-Steel "hose" clamps. This allowed me to install it in a "blind" situation where the U-bolts could not be fitted. My application was to a 4" ABS pipe, and so I could use the special PVC-ABS glue to make the sealing-bond, and the hose clamps to first initiate and then reinforce the placement.
S**K
Perfect For A Tight Spot
This is just the ticket if you are trying to tie into a buried 4-inch drain line and you're not in the mood to dig up the entire yard. As the product description says, this saddle tap is designed for schedule 40 pipe. Unfortunately, most rain gutter drains and many other plastic drain pipes are SDR35, which has a slightly smaller outside diameter than a 4" schedule 40 pipe. I found the saddle didn't seat quite perfectly onto my SDR35 (thin wall) PVC pipe, so we cut a small piece from a scrap of the SDR35 pipe as show in the photo, which matches the size of the saddle tap. This piece was sandwiched between the saddle and exposed portion of the buried pipe. It makes the fit to the saddle darned near perfect. Be sure to dry fit everything together before you touch any glue. We found it best to mark the tap hole with a marker and drill it out before assembling everything together with glue. Use a good quality PVC cement, work fast, and apply solvent to both sides of the sandwich piece, saddle tap interior and the pipe you are attaching to. Getting glue on your hands is inevitable, so wear gloves if you don't want to get messy. Hold tightly or clamp in place long enough for the glue to set, then quickly tighten the u-bolt clamp into place. This is just my experience - your situation/application may be different.
B**B
For schedule 80 pipe
This works great for tapping a live drain but it is for schedule 80 pipe so if you are using schedule 40 pipe you will need to get an extra piece of schedule 40 at least the length of this unit. Slice it down the length of it, prime and glue both pipes and snap your sliced pipe over the drain pipe. Let the glue set, then prime and glue the unit over that following the directions. Once the glue dries, run your hole saw through it making sure not to lose the piece in the pipe (stop short, secure with screw as a handle and break free) debur the edge and it's ready for service.
Trustpilot
2 months ago
2 weeks ago