We remain fully operational. Our teams are working around the clock to ensure your deliveries continue safely.
下载应用程序


Buy anything from 5,000+ international stores. One checkout price. No surprise fees. Join 2M+ shoppers on Desertcart.
Desertcart purchases this item on your behalf and handles shipping, customs, and support to SINGAPORE.
✨ Restore brilliance, erase the past, and shine like new! ✨
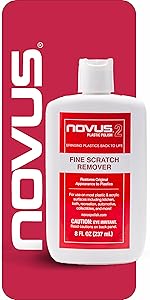
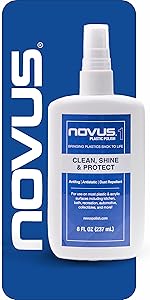
The NOVUS-PK1-2 Plastic Clean & Shine Kit features three specialized 2-ounce bottles designed for a comprehensive 3-step plastic restoration: heavy scratch remover (#3), fine scratch remover (#2), and final polish (#1). Paired with disposable Polish Mates towels, this kit effectively cleans, repairs, and polishes acrylic and plastic surfaces, making it ideal for collectors, automotive enthusiasts, and homeowners seeking to revive scratched or faded plastics with professional-grade results.


| ASIN | B002UD0GIG |
| Best Sellers Rank | #34,630 in Automotive ( See Top 100 in Automotive ) #28 in Polishing & Waxing Kits |
| Brand | Novus |
| Brand Name | Novus |
| Contains Liquid Contents | Yes |
| Contains Liquid Contents? | Yes |
| Customer Reviews | 4.2 out of 5 stars 4,064 Reviews |
| Global Trade Identification Number | 00077918071361 |
| Item Weight | 0.4 Pounds |
| Manufacturer | NOVUS |
| UPC | 779180071369 077918071361 |
D**S
Works well
Great for cleaning and polishing plastic windscreen
C**E
The answer to any collector who wants to restore old toy collectables
I'm going to review this product from an application many have not used in these reviews, but I imagine many have come here hoping they had - restoration of toy plastic. I purchased this product with the intent to restore an old Kenner Batmobile (Batmissile) vehicle. It had a number of quite visible scratches and blemishes on the vehicle including one spot where I had tried to wet sand it leaving a ugly haze of scratches effectively ruining the sheen. So this product had allot cut out for it in terms of making this vehicle look good again. I hate saying this because I sound like a damn info commercial but this stuff is miraculous. Between the number 3 and number 2 applications I completely removed every scratch and blemish on this car. And I do mean EVERY SINGLE SCRATCH including that haze of scratches I left from using a abrasive pad on the surface. It looks better than brand new. But there's something missing in these ads for the product that you need to know if you want to make this stuff work at its utmost best - Elbow grease and multiple applications. These scratches took some effort getting there so it took some effort getting them out. I had to go over the hood portion three times with the #3 solution and then start buffing with #2 before I saw definitive results. If you think you're going to get there like your wiping a window, you're mistaken. And I imagine some of the people disappointed here were led to believe that's all that was needed. Not so. Think about it like you're buffing your car. You have to apply some pressure and do some serious rubbing until it dries then repeat. Use a cloth for each tube. Do not use the same one for multiple bottles. #3 takes down the deep scratches while #2 works on the surface ones. #1 is a cleaning agent to finalize the process and remove any residual application. I even took an old GI Joe windshield from an Adventure Team helicopter that was scratched and weathered and restored it to like new. This stuff works folks, but you HAVE to put some work into them. Now like anything, common sense has to be applied here. If you have a half inch cut in plastic, you're not going to "wipe" that away. But if its something on the surface that even leaves a bit of texture to the touch, this will take it off and leave a beautiful sheen afterwords. It's great stuff and I'm going to start using it on all my old Mego vehicles and essentially anything that fits the bill of being worn out plastic. So if you have old plastic collectible toys that have these problems? THIS is your stuff. It will restore them to like-new condition and I NEVER thought I could say that about any product. Give it a try and remember to put some elbow grease into it. You'll get the results you're looking for.
D**A
Great for minor to medium hairline scratch removal from plastic material.
Very good product when using on plastic turntable dust covers. Takes out about 75% of the scratches. There are still very fine hairline scratches after going through the prescribed scratch removal process. If trying to take out deep nicks / scratches, a more aggressive scratch removing process is needed (i.e. using various grit sand paper vs. this 3 stage liquid kit.). Otherwise, this kit is a fine product for minor to medium hairline scratch removal.
C**S
I achieved amazing results but you really need a random orbit sander or an electric buffer to get the best finish.
I recently got a really good deal on a Galaxy Note 8.0. tablet. The reason was the lens cover for the camera had major scratches, really deep and the photos came out as if you had a “soft lens” on it. Like for 1980’s glamour photography. Usually you can just replace the plastic lens cover, I have done it before on a galaxy S4 phone. So I bought it and after much searching found no lens covers for sale that would work for the Note 8. Only choice was to buy the entire back case, for too much money. So onto Amazon I went looking for something to polish the lens cover. I have up-loaded a photo showing the before and after, it is a pretty dramatic difference. First off, I read many of the reviews for the NOVUS Plastic Polish and saw many that said they never even used the #3 Heavy Scratch Remover. I think because of the amount of scratches I had, this was the one that really removed the deep scratches and the haze. At first I tried to use the cloth that came with it, and just my finger, I started with #2 thinking #3 would be too harsh, but I soon realized that this way was not going to do it. Or maybe it would have worked but it would take many, many hours of rubbing. I used my Ryobi 5 in. Random Orbit Sander, and a cotton cloth cut to fit on it. I really don’t think you could achieve what I did with out one, the whole process took about 45 minutes. I taped up the back cover with painter tape to protect it while buffing. I had to run it in short sets, like 30 seconds a full speed then stop and make sure the lens cover was not getting too hot. I would add a very small amount of water to the cloth then some more #3. But slowly I could see the outer edges of the scratched area getting smaller and smaller. I kept the process up until almost all of the haze was gone, there was a small spot (size of a pin head) on the outer edge that would not effect the camera’s image. I then changed out the cloth and began the process again with the #2. There were noticeable swirl marks from the #3 but still much clearer than it had been, I would have been happy with that. But after the 3rd stop to add dabs of water and more #2, the small spot that was left over from #3 was gone. I kept it up until it looked like nothing was changing; it was not getting any clearer. I removed the painters tape, and started the clean-up process. Peeling the tape up and using the #1 cleaner on the back of the tablet and ending with the lens cover. The results were way more than what I expected, the lens cover was polished and shiny, the camera’s photos looked great. Even the decorative metal ring that is around the lens cover was shining. So to wrap it up the NOVUS Plastic Polish is capable of amazing results, but you might need to have some other tools to really get the most out of it, namely a random orbit sander or a small buffer. The RYOBI sander I used does 12,500 orbits per minute, if you moved your finger once every second across the area you wanted to polish, it would take a person 3.5 hours to do what this sander does in 1 minute. Or 5 minutes using a sander would be the equivalent of 17.5 hrs by hand.
D**G
Does not work on all plastic
Did not get rid of scratches on my watch. But did help with a magnifying glass.
A**N
Excellent!! Saved me $800!!
So here is a little background before i start raving about how wonderful this product is... I recently purchased a used car and it has a small display right above the dash which displays the time, radio station and other irrelevant things. This display has a plexiglass cover over it. The previous owner had sprayed it with some chemicals which caused spots to appear on it. These spots annoyed me every time i looked at the display. So i decided to do something about it and purchased a spot cleaner from Amazon. This spot cleaner of course came with a nice booklet about dos and dont's which i chose to not read. BIG mistake. I was not supposed to use it on plastics and mine being a plexiglass, it didnt quiet go well. After rubbing(sanding) it on the display for a good 5 minutes, the spots were gone alright, but so was the plexiglass surface. I had totally messed up the display. It had so many minute scratches, it looked almost "frosted". It was worse than before. I could barely see through the glass now. I did ask my dealer about fixing this and he said i will have to replace the whole front assembly of the display which costs $800. So i started looking around for a good scratch remover to try my luck at fixing it myself. I decided to give this a try after reading all the good reviews it had. It came with the three bottles labelled 1,2,3 as pictured. I started with the number 1 bottle first to clean the surface of the plexiglass. Then proceeded to use the number 2 bottle. Applied the thick paste on to it and started working it. I did this for probably a minute. There was a white residue on the surface after it dried. I again poured some from the number 1 bottle and wiped the residue off. To my surprise i could see a huge difference already. The "frosty" look was almost gone! I could see through the glass again clearly. There were a few scratches still visible so i went to work on it again repeating the same steps. This time it was even better!! All it took was two applications of the number 2 bottle and i didnt even have to use the number 3. The surface is not completely scratch free but you can hardly notice them. I will probably have to use it again to completely remove the scratches but i am happy for now. So there you go, if you wanna polish out some scratches and bring back the luster to the surface of your plastics, definitely give this a try first before looking into more expensive options. Hopefully it will save you a lot of $$ just like it did for me. Cheers!!
N**A
Clear acrylic "ghost" chair damage from pure acetone reversed!
Oh my god. I LOVE this! I bought it before a few years back just to polish the plastic on the interior of my car. It was good, but I didn't have major scratches. Fast forward to redecorating my apartment & buying clear "ghost" chairs (Ikea, Polycarbonate plastic, but still $80 a chair) and an acrylic tray I got from West Elm on deep discount because of a deep scratch (85% off) & figured I would deal with it, even though it bothered me every time I looked at it (so anal). Well, a couple of days ago I saw some thing stuck on one of the chairs, right on the top back, which I tried cleaning off with regular cleaner to no avail. Then I thought..I don't know what that is..maybe nail polish remover will get it off? OK OK - I didn't know that acetone absolutely destroys plastic so immediately and thoroughly! Pure acetone takes SO long to take fake nails off, I couldn't imagine a tiny dab for a second using a Q-tip could do so much damage. Nooooo!!! How could it possibly be worse?! It was so bad, dull scratched and about an inch all around, totally obvious above the table & no way to hide it. The cleaning ladies came and asked me what happened & I shamefully admitted to it. I was thinking I had to buy a new replacement chair just weeks after buying this set. Ouch. :-( And then I remembered this stuff & thought it was worth a try. The Novus kit came to my door & I immediately went to test it on the chair. I figured... it was my last hope. I skipped #1 all together and tried #2. Nope. Nothing. Then #3... and it was working! The edges that were slightly damaged were clear again. I went over it 5 times and you absolutely CANNOT tell how badly I messed up. It is perfectly clear & see through again. And my eagle eyes cannot even tell where the scratch was! Now only you & the cleaning ladies will ever know what a dumb thing I did. Yippee!!! Then I used #2 to take out some minor scratches on the seat of another chair (probably from someone's jeans that had buttons or metal) and it cleared up in one coat. It also polished up the tray with deep scratches like a charm too (only took 1 coat of the #3). Miracle stuff! I am SO happy I remembered this exists. If you have ghost chairs (especially those that paid hundreds of dollars per chair) or acrylic in your home, I recommend having this on hand. We KNOW acrylic furniture will scratch, but there is a way to polish it up!
L**.
Does not work on plastic monitor screens
Unfortunately, this product is a waste of money, at least in my application, which was scratch repair in a Dell 19" computer monitor with plastic screen. - There are two scratches, and both look fairly small to me. I initially attempted using only the "fine scratch remover" (after cleaning the site), and this did nothing. - I then attempted to use the "heavy scratch remover" by following the directions on the bottle, following it with the fine scratch remover and then the plastic shine. Again, nothing. - Last, I watched videos where folks applied the heavy scratch remover in circles (rather than perpendicular to the crack, as the instructions say) and then followed up with fine remover and polish. I did this, and, again, no difference. Cracks remain, but my monitor screen looks like I spilled coffee on half of it (see image).
TrustPilot
1天前
1 个月前